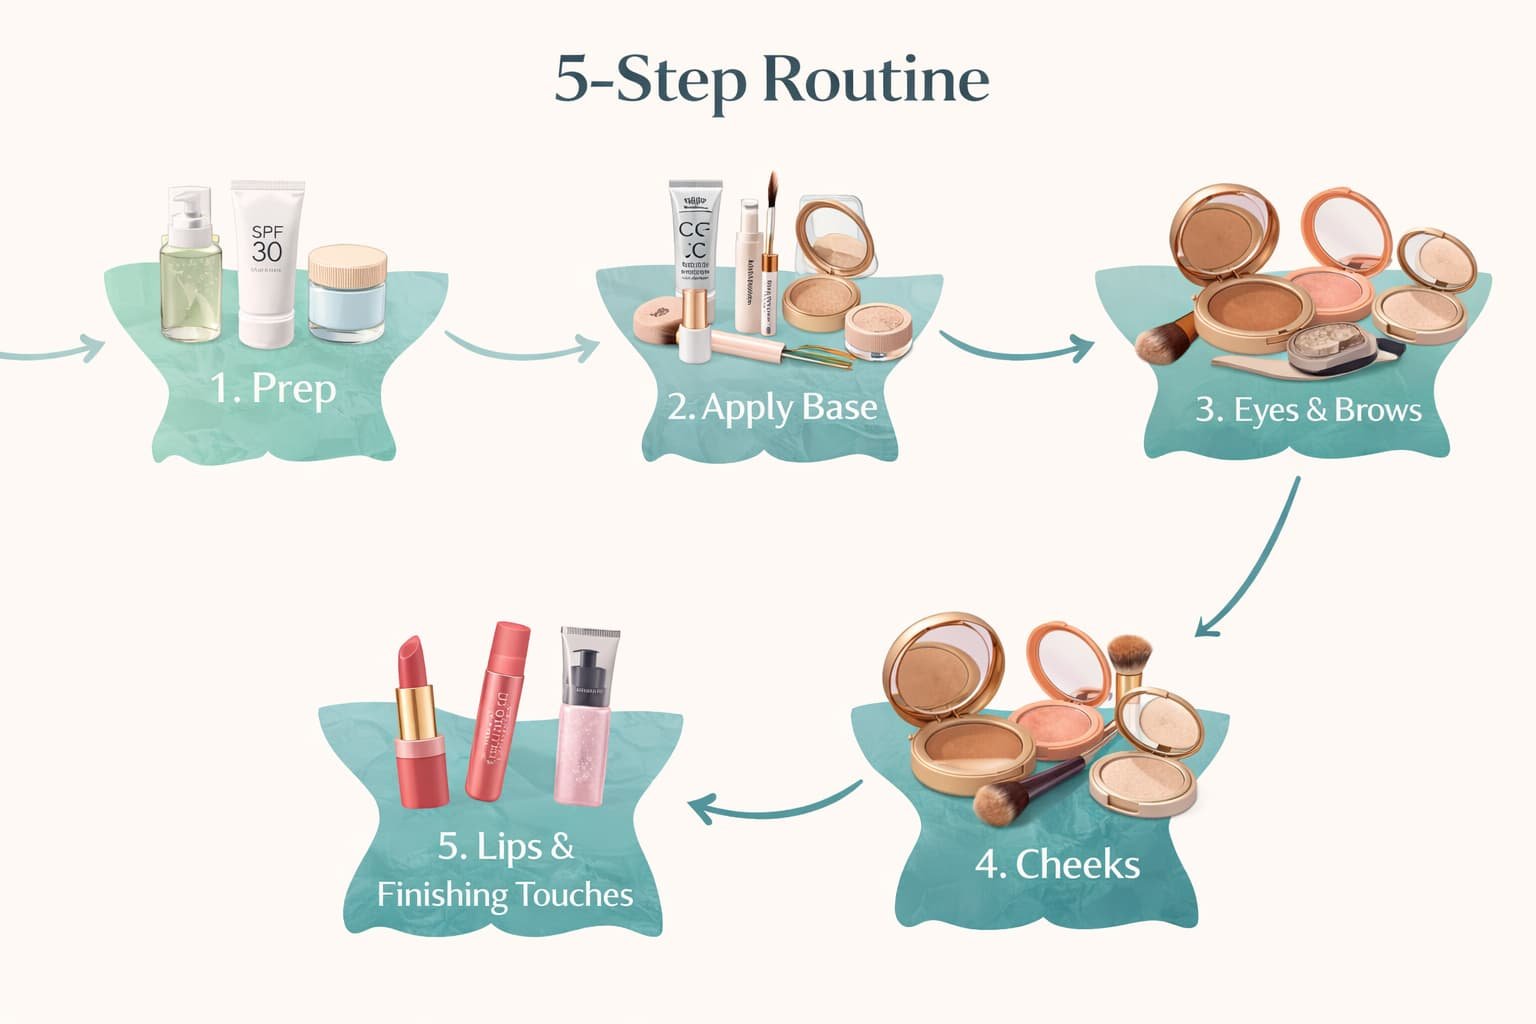
The Ultimate Everyday Makeup Routine Daily makeup routines can be quick, simple, and suitable for beginners, busy professionals, or students. This report lays out a gentle yet effective five-step routine that can be done in 5–20 minutes, using basic tools and products. It covers all skin types (oily, dry, combination, sensitive) and skin tones (light through deep), and offers product and budget options (drugstore, mid-range, high-end). Key skincare prep (cleanse, moisturize, sunscreen) is emphasized to protect skin. The five steps are: (1) Skin Prep (cleanse, moisturize, primer, SPF), (2) Base (foundation or tinted moisturizer + concealer + setting powder), (3) Eyes & Brows (fill/gel brows, neutral eyeshadow, mascara), (4) Cheeks (bronzer, blush, highlighter), and (5) Lips & Finishing (balm or lip color and final touches). Each step has timing guidance (about 1–5 minutes each). Troubleshooting tips (fixing shine, patchiness, cakiness) and quick variations (no-makeup look, long-wear, humid weather) are included. We give specific product examples (at least 10 brands) across budgets and skin types, and compare choices in tables. A minimalist five-item kit checklist and a visual flowchart of the five steps are provided to help beginners. All recommendations rely on expert and brand sources, dermatology guidelines, and beauty reviews to ensure safety and effectiveness.
Thank you for reading this post, don't forget to subscribe!Understanding Audience, Skin Types, and Tones
The routine is designed for beginners and anyone with little time (e.g. busy moms, professionals, students). It assumes no special skills and uses common products. The steps are gentle and easy to follow. We address all skin types:
- Oily skin: Choose oil-free or mattifying products. A mattifying primer and powder will control shine. Avoid heavy or creamy formulas that can clog pores.
- Dry skin: Use hydrating products. Cream or serum-like formulas (cream blush, dewy foundation) add moisture. A hydrating primer and a creamy base prevent flaking.
- Combination skin: Mix approaches (e.g. matte primer + hydrating moisturizer). Use powder on oily areas (T-zone) and cream on dry areas.
- Sensitive skin: Pick fragrance-free, gentle products (mineral makeup, hypoallergenic brands). Always patch-test new products and remove makeup gently.
We also cover skin tone inclusivity. Foundations and concealers should match your undertone (warm, cool, neutral) and depth. For light, medium, or deep tones, choose brands with wide shade ranges (e.g. Fenty Beauty, MAC, NARS). Tips: test foundation on the jawline to match neck, and blend well. Highlight and blush colors should complement your natural blush: peach and pink tones flatter many, while deeper berry or plum shades suit richer skin. Even with minimal coverage, the goal is to even and enhance your natural tone.
Time and Budget Considerations
This routine can fit in 5 minutes (basic “no-makeup” glow) up to 20 minutes (more detailed application). For a 5-minute look, focus on essentials (tinted moisturizer, concealer, brows, mascara, balm). For a fuller look (10–20 min), include primer, eyeshadow, contouring, and more layering. Choose products by your budget:
- Drugstore (affordable): e.g., Maybelline, L’Oréal, NYX. These brands offer quality basics like L’Oréal foundations or Maybelline concealers that work well.
- Mid-range: e.g., Tarte, Clinique, IT Cosmetics. They have better textures or longer wear (Tarte Shape Tape concealer, Clinique primers).
- High-end/splurge: e.g., Hourglass, Armani, Dior. These often have luxury formulas or packaging (Hourglass setting powder, Armani foundation).
Each category will note examples. The tables below compare product picks by budget (and by skin type). Overall, simple products like tinted moisturizers and multipurpose cream sticks save time and money.
Essential Tools and Products
Makeup tools: keep it simple. You need:
- Brushes/Sponges: A foundation brush or damp sponge, a blush brush, and an eyeshadow brush. (A multi-purpose blender sponge like Beautyblender works for base and concealer.) Clean them weekly to avoid breakouts.
- Grooming tools: Eyebrow brush or spoolie, cotton swabs, and facial cleansing wipe (just for emergency cleanup). Always wash hands before applying.
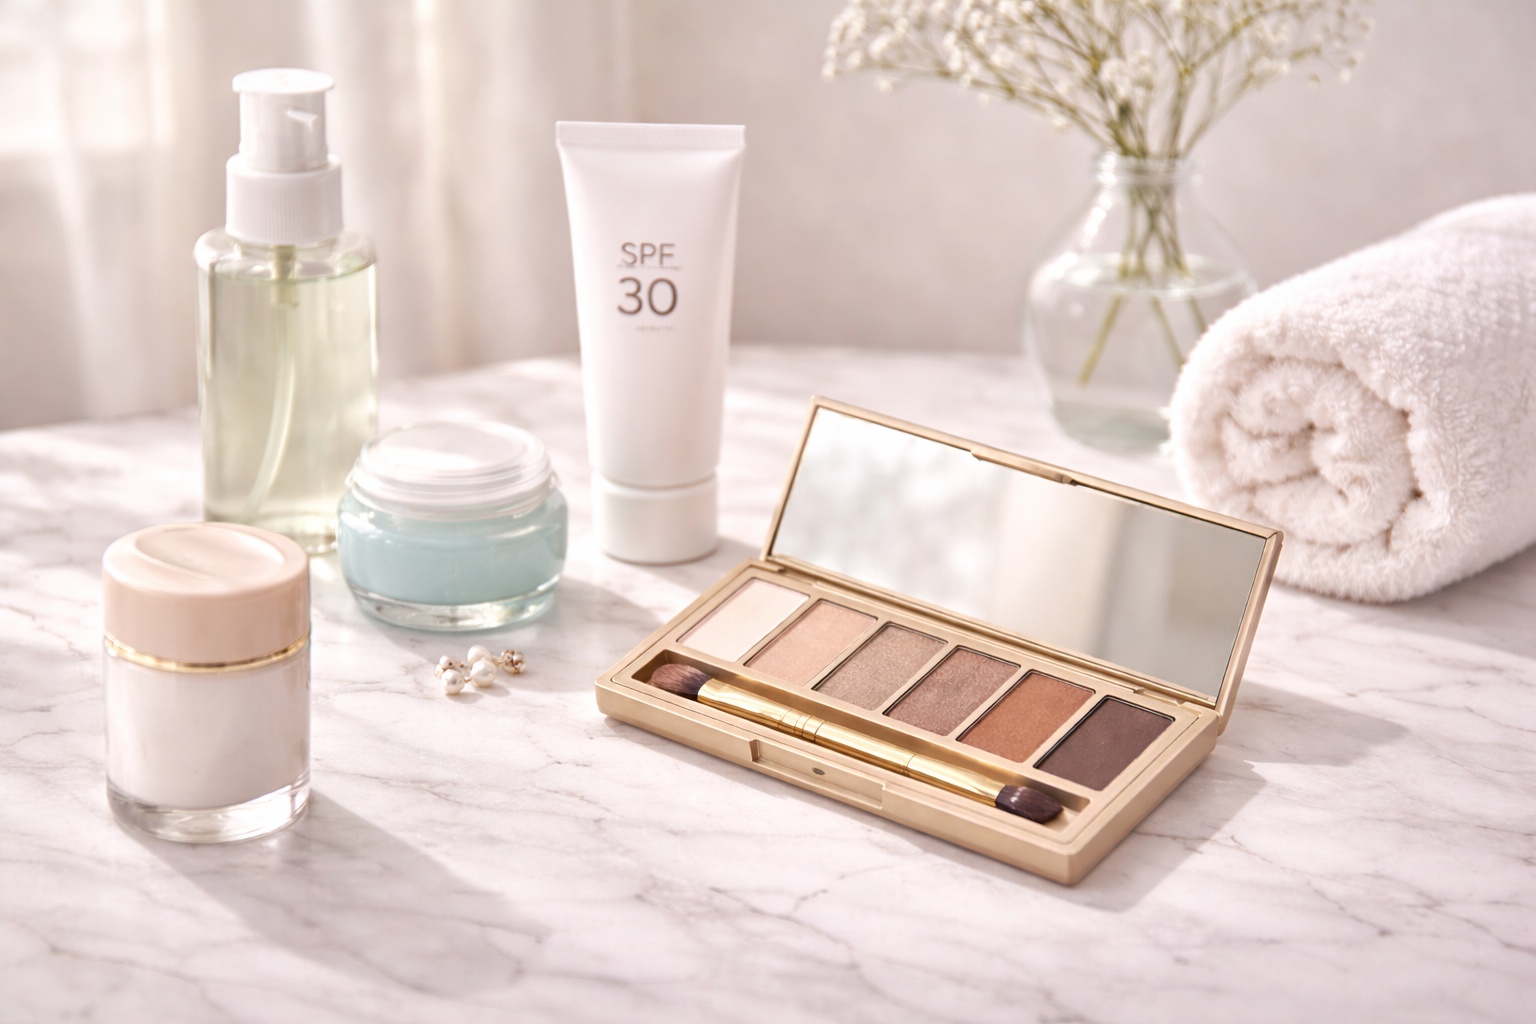
Key products by category: primers, moisturizer with SPF, foundation or tinted moisturizer, concealer, setting powder, bronzer, blush, highlighter, neutral eyeshadow, mascara, brow pencil/gel, lip balm or tint. We recommend products that are widely available and suit daily wear. For example, dermatologists stress daily sunscreen – use a broad-spectrum SPF 30+ (like CeraVe AM SPF 30) even under makeup. Primer is optional but helps makeup last; it can mattify or add glow and even out skin. For eyes, a neutral eyeshadow palette (shown below) and mascara are enough for most day looks.

1. Hygiene and Skin Care Prep (Step 1)
Begin with clean, healthy skin. Dermatologists recommend a gentle morning cleanse if needed (to remove night-time oils). Use a mild cleanser for your skin type (gel or foam for oily, cream or milk for dry). Pat skin dry and moisturize immediately. A moisturizer “hydrates and softens” skin; use a lightweight gel/gel-cream if oily, and a richer cream if dry. Let it absorb. Next, apply broad-spectrum SPF 30+ sunscreen (AAD advises everyone should use SPF daily). If you wear a tinted moisturizer or BB cream with SPF (like IT Cosmetics CC+ SPF 50), that helps, but it’s still wise to put on a dedicated sunscreen underneath. Sunscreen protects against UV even through windows, so make it non-negotiable. Finish prepping by applying a primer (if you use one). Choose a primer suited to your needs: for example, mattifying primers (Rimmel Stay Matte or Smashbox Photo Finish) control shine on oily skin, while luminous primers (Tatcha Luminous Dewy) benefit dry skin. Some primers also have SPF built in (e.g. NYX Primer SPF 30), which can simplify the routine. Primer smooths pores and fine lines and helps makeup adhere. At this point your skin is a smooth, protected canvas. (Time for Step 1: ~1–2 minutes.)
Step 2: Apply Base – Foundation/Tinted Moisturizer, Concealer, Powder
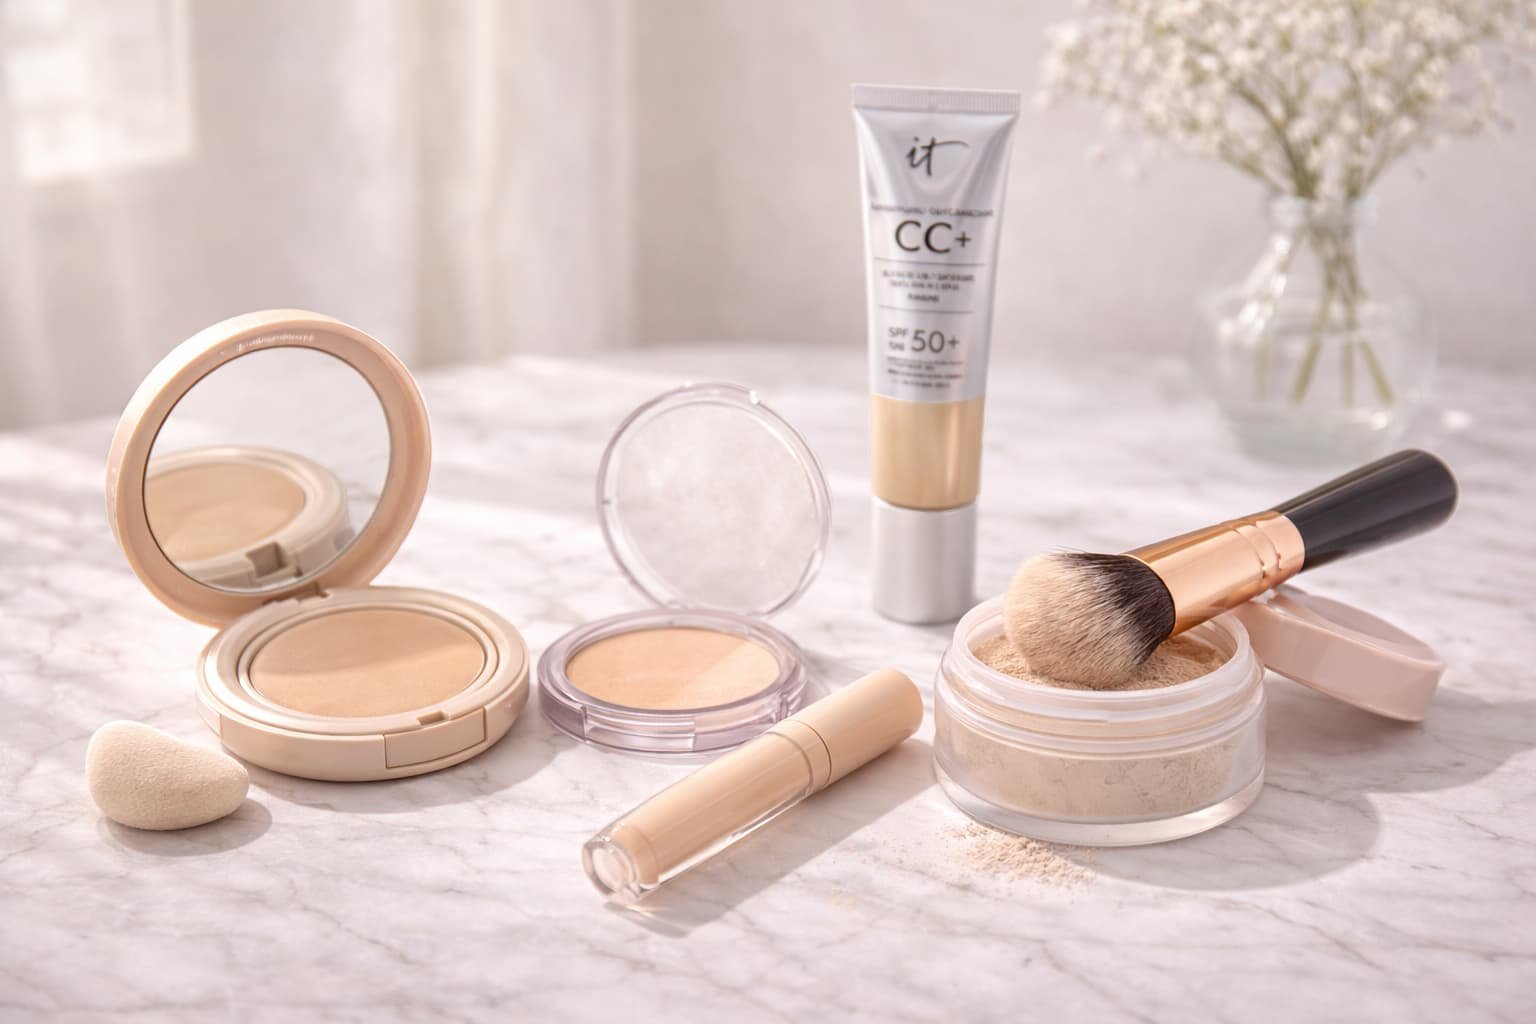
Now even out your skin tone. Use either a tinted moisturizer or foundation. For a natural look in 5 minutes, a tinted moisturizer or BB cream can quickly even tone and hydrate at once. Examples: Neutrogena Hydro Boost Tinted Moisturizer (drugstore) for light coverage, IT Cosmetics Your Skin But Better CC+ Cream (mid-range) for more coverage and SPF, or Armani Luminous Silk foundation (high-end) for buildable, luminous coverage. (Allure notes Armani’s new formula is hydrating and suits all skin types.) If you prefer powder foundations, dry or acne-prone skin can use a mineral powder (BareMinerals or Aspect Minerals). Choose a shade that matches your undertone (warm/cool/neutral) – a too-light foundation looks ashy, too-dark looks mask-like. Test shade on jaw or wrist for reference.
Apply your base with clean fingers, sponge, or brush. Many find dabbing with fingers is fastest and warm fingers help blend (Adore Beauty blogger recommends fingers for concealer for a natural blend). Blend foundation/tint from the center of face outward in light strokes. You may only need a dot on cheeks, forehead, and chin, then blend; skip heavy coverage on areas without redness. For efficiency, some skip separate primer and mix a drop of moisturizer in.
Next, use concealer on specific areas: under eyes, around nostrils, or any red spots. A lightweight concealer brightens under-eyes (e.g. Maybelline Fit Me Age Rewind concealer – drugstore favorite, or Tarte Shape Tape – mid-range). Pat concealer with a finger or small brush into skin. For dark circles, use a shade one lighter than your skin tone. For redness or blemishes, use one that matches your skin. Adore Beauty notes even a tiny bit of concealer “brightens under-eyes” and using ring finger helps it melt in. Also, avoid using too much: a pea-size drop each eye and spot should suffice.
Optionally, lightly dust a translucent powder to set the base, especially if you have oily skin or want longer wear. A fine powder prevents shine. A setting powder also locks concealer. (People with dry skin may skip powder to retain dewiness.) Use a fluffy brush and very gently sweep (avoiding the under-eye area to prevent creasing). Good powders: Rimmel Stay Matte (drugstore) or Laura Mercier Translucent Setting Powder (mid-range). Focus on T-zone (forehead, nose, chin). If you prefer dewiness, you can skip powder or use it only on oily spots. (Time for Step 2: ~2–3 minutes.)
Troubleshooting Base: If foundation looks cakey or patchy, you may have used too much or not blended well. Try moistening your sponge and blending to soften the finish. If skin is patchy (dry flaking), prep better: use a cream product instead of powder. For oily skin, a bit more powder or a mattifying primer (or blotting sheet midday) prevents shine. Always remove makeup at night to keep skin clear.
Step 3: Eyes and Brows
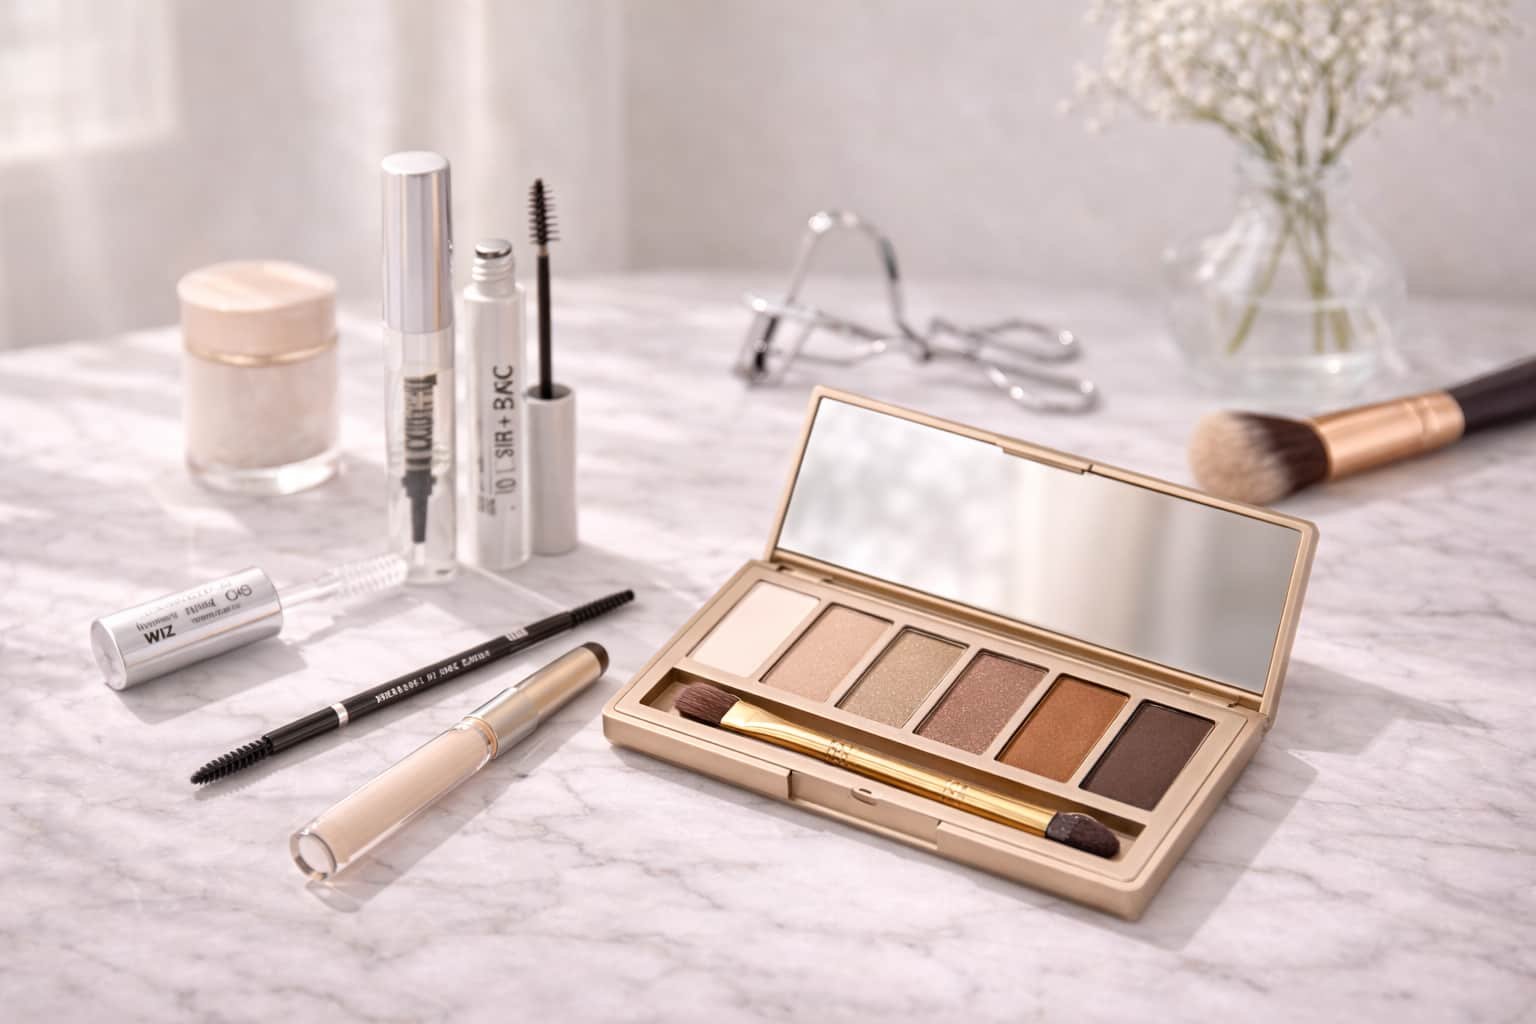
Eyes and brows help frame the face. This step can be very quick. First, fill in and groom brows. A nice brow shape makes a big difference. Use a brow pencil or pomade close to your hair color (for example, NYX Micro Brow pencil – budget, or Anastasia Brow Wiz – mid-range). Draw light, hair-like strokes in any sparse spots. Then, brush brows upward or outward with a spoolie or clear tinted brow gel to set them. One step: a clear brow gel (e.g. Benefit 24-Hour Brow Setter – mid-end, or e.l.f. Clear Brow & Lash Mascara – drugstore) can replace both shaping and filling. Gel alone (even tinted) can define without needing pencil. The Adore beauty guide says a tinted or clear brow gel on quick mornings gives a “fluffy” natural look.
Next, apply a neutral eyeshadow if desired. For a simple everyday look, one light-to-medium shade across the lid is enough. Use a cream shadow or powder in nude/bronze/brown tones. Quick options: swipe a flesh-colored eye primer (or concealer) on lid and dust a matte bone or taupe shadow to even color. The McLean dermatologist site even suggests skipping eyeshadow and using translucent powder on lids to absorb oil and keep lashes clean. If you prefer color, an eyeshadow palette with neutral shades works well. (Shown below is an example palette.)
with a finger or brush: sweep a soft brown or champagne color across the lid up to the crease. This step is optional; skip it if you’re very rushed.
For extra definition, line the eyes with pencil in the upper lash line or lightly on the crease. Choose brown or charcoal black (not harsh black). Press a dark brown eyeliner near lashes, or a bit along the upper lash line. Blend or smudge slightly for a soft effect. Under the eyes, you can smudge a tiny bit of that pencil for subtle definition. The McLean Dermatology guide finds pencil liner under lashes, blended, makes eyes pop without much effort. This enhances dark eyes or brightens light ones, but it’s optional for a 5-step daily routine.
Finish eyes with mascara. One coat of black or brown mascara on top lashes opens up eyes (bottom lashes are optional – often skipped in a super-quick look). Use a clean wand, wiggle at the base of lashes then pull up. If you have very pale lashes, a coat or two of a lengthening formula (e.g. L’Oreal Telescopic – drugstore, or Lancôme Lash Idôle – higher-end) is helpful. For very natural look, a clear or brown-tinted mascara/gel suffices. Allow mascara to dry and avoid smudging by looking up or down while applying. (Time for Step 3: ~1–2 minutes.)
Troubleshooting Eyes: If eyeshadow creases or mascara smudges, ensure lids are dry (powder primer works). If mascara clumps, wipe excess off wand on a tissue before applying. Fix smudges gently with a cotton swab and concealer. If brows look too dark, brush through them to soften.
Step 4: Cheeks – Bronzer, Blush, Highlighter
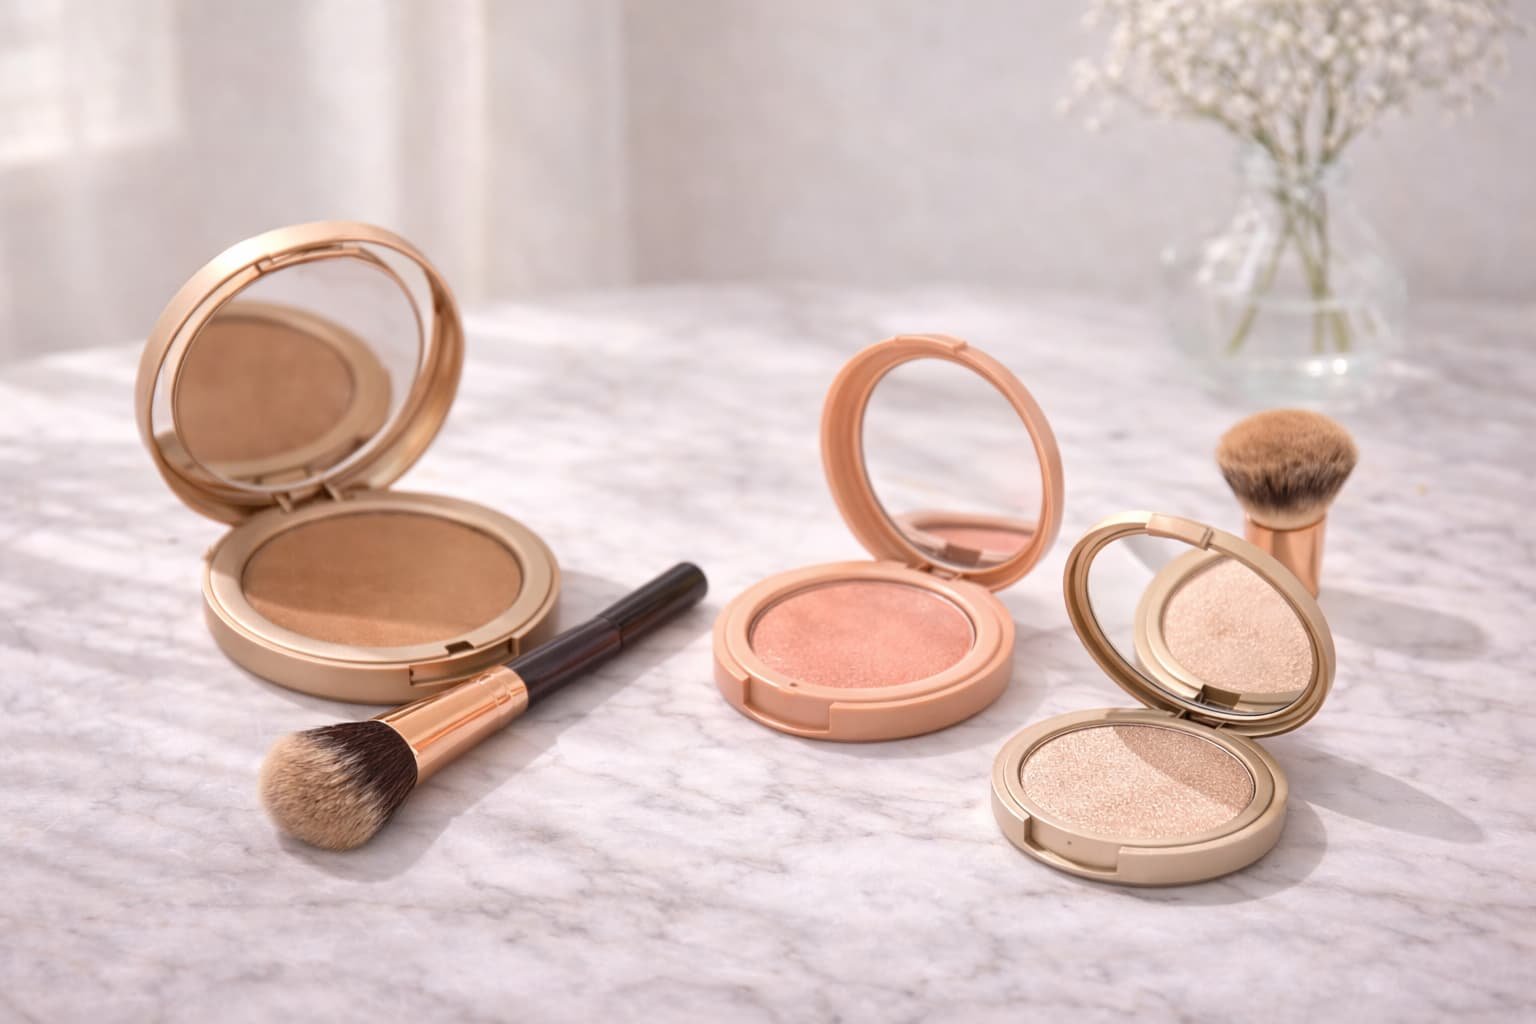
Add healthy color to your face. First, apply bronzer lightly. Using a fluffy brush, swirl bronzer along hairline, temples, and under the cheekbones (like a light contour). Powder bronzer (Benefit Hoola – mid-range; Physicians Formula Butter Bronzer – drugstore) warms up complexion. Cream bronzer (Anastasia Cream Bronzer – mid) or tinted lotion works well for dry skin. For example, a dab of cream bronzer on the cheeks and forehead edges is enough. Blend well. This gives subtle shape to the face. The Adore Beauty routine uses cream bronzer for a natural glow. If you skip bronzer on quick days, you can use a light wipe of contour shade under the cheekbones for definition.
Next, apply blush. Choose a shade like soft pink, peach, or mauve that suits your skin tone (fair: pink/peach, medium: peach or rose, deep: warm plum/berry). A cream or gel blush adds dewy color quickly; try Milani Baked Blush (drugstore) or Glossier Cloud Paint (mid). Creams can double as lip color too. Apply on the apples of cheeks (smile to find them) and sweep toward temples. If using powder blush (NARS Orgasm – mid; e.l.f. Baked Blush – drugstore), apply with a fluffy brush for a sheer flush. Blush should look like a natural flush, not heavy. The Adore guide loves cream blush for a “glowy finish” close to natural skin. Hint: The same cream blush used on cheeks can dab on lips as a tinted balm; this saves a step.
If desired, add highlighter. Using a fingertip or small brush, lightly dab a luminous highlight on cheekbones, brow bone, and tip of nose. This is optional but gives a fresh glow. A small sweep on Cupid’s bow (above lip) makes lips pop. Example: Wet n Wild MegaGlo (budget) or Becca Shimmering Skin Perfector (mid). Keep it subtle. (Time for Step 4: ~1 minute.)
Troubleshooting Cheeks: To avoid “clown cheeks,” smile less, apply blush on the upper cheek (not cheek sides) and blend out. Oily skin may prefer powder blush and bronzer to stay put longer. If skin looks flat after concealer, a bit of blush instantly “brings life back”. Cream products can help dry skin avoid patchiness. If cheek products patch, ensure skin was prepped (hydrated) and use lighter layers.
Step 5: Lips and Finishing Touches
Finish the look by defining the lips and finalizing any details. First, apply a lip balm or tint. A tinted lip balm (like Burt’s Bees tinted balms – drugstore) or sheer lipstick adds hydration and subtle color. For minimal makeup days, even a clear balm (with SPF, see AAD advice about lip SPF) is enough. Otherwise, choose a shade that complements your blush (coral, pink, nude, etc.). A quick swipe of lipstick or lip tint transforms the face. For example, warm undertones look great in peachy or coral shades, cool undertones in rosy pinks. If you want one fewer product, use the same cream blush on lips (multi-use sticks are convenient). Keep a mirror handy to apply neatly.
Add any finishing touches: check brows (gel if needed), smooth out any harsh lines with a finger or brush (especially around nose or jaw), and lightly sweep translucent powder on the T-zone if needed for last-minute shine control. A spritz of setting spray (e.g. Urban Decay All Nighter) will make makeup last longer but is optional. You can also dot a small highlighter on the inner corners of eyes for brightness (optional).
Finally, glance at your full face to ensure everything is blended and looks even. If wearing glasses, you may skip eyeliner (it smudges easily) and focus on brows and mascara. (Time for Step 5: ~30 seconds to 1 minute.)
Mermaid Flowchart of the 5-Step Routine: This flowchart summarizes the order of steps visually. Use it to remember the sequence:
Troubleshooting Common Issues
How to Do Advanced Yoga Poses: Step-by-Step Tutorials 2026
- Oily/Shiny Skin: Use an oil-free primer and matte foundation (e.g. L’Oréal Infallible Matte). Set oily areas with translucent powder (or try blotting papers mid-day). Byrdie reports a mattifying primer and powder helps control shine. Carry blotting sheets if sweat is a problem.
- Dry/Flaky Skin: Exfoliate gently at night and focus on hydration: use a moisturizing primer or mix foundation with facial oil. Cream (rather than powder) products blend better on dry skin. Avoid heavy powders on dry patches.
- Clogged Pores/Breakouts: Choose non-comedogenic formulas (e.g. physician-recommended). Clean brushes and sponges often. Remove makeup fully at night. Light coverage means less chance to trap oil.
- Foundation Looks Cakey: This means too much product or wrong formula. If heavy, dampen your sponge and blend, or remove and reapply more lightly. Try a sheer tinted moisturizer instead.
- Concealer Creasing: Gently pat and blend out edges, use only a tiny amount. Set lightly with powder. Using a thin, hydrating concealer can avoid crease.
- Eyeshadow Crease/Fallout: Use an eyelid primer or apply a light dusting of face powder on lids (McLean Derm recommends powder on lids to keep makeup in place and absorb oil). Tap off excess shadow from brush to minimize fallout.
- Mascara Flakes/Smudges: Opt for a waterproof or long-wear mascara for humid or long days. Apply one coat and let it dry. Avoid applying mascara to bottom lashes to prevent smudging and mess.
- Lipstick Transfers/Fades: Line lips first, or choose long-wear tints. For longer wear, blot excess and reapply. Always include a lip balm in your routine (AAD suggests an SPF lip balm).
The Ultimate Everyday Makeup Routine Quick Variations
-
“No-Makeup” Look: Focus on skin prep and a few key products. Use a tinted moisturizer with SPF instead of foundation. Apply concealer only where needed. Use a soft cream blush for cheeks and lips (a single product does both). Groom brows with a tinted gel only. Skip eyeshadow; just curl lashes and add mascara. Finish with a nude lip balm. The result is fresh and subtle. (Iba Cosmetics recommends even skipping brow product when rushed and just tinted moisturizer + concealer to cut the routine to ~4 minutes.)
-
Long-Wear Day (e.g. office or event): Add a primer and setting spray. Use a foundation known for longevity (Allure suggests Estée Lauder Double Wear for oil control). Powder with a long-wear setting powder. Choose waterproof mascara and eyeliner. Reapply a thin layer of powder or lip color midday if needed. Avoid creamy products that may move. Long-wear specific products (setting sprays, waterproof formulas) will help makeup last through meetings or sweat.
-
Hot/Humid Weather: Keep it minimal. Use gel or mineral products (less makeup to melt). A tinted gel moisturizer can replace separate moisturizer+foundation. Dust more powder (especially on oily eyelids) to control sweat. Water-resistant mascara prevents smears. Light cream products (cream blush, brow gel) can look more natural in heat. Consider a matte lip stain instead of sticky gloss. If skin gets oily, a translucent powder touch-up is best.
-
Cold/Dry Conditions: Choose hydrating foundations (dewy finish) and cream products (cream blush, cream highlight). Avoid matte powders that may accentuate dryness. Primer with hyaluronic acid is good. Lips chap easily, so wear a nourishing balm, possibly with color.
-
Add Sparkle (Evening variation): If desired, add a darker eyeshadow in the crease or eyeliner for a smokier eye, and a brighter lipstick. But this is beyond the 5-step routine’s scope; keep the daily look simple as the base.
Product Recommendations and Comparisons
Below are recommended products, illustrating options by budget and skin type. These examples are well-reviewed by beauty experts. Remember: choose shades for your tone and formulas for your needs (e.g. oil-free if oily).
Products by Budget: (Drugstore = very affordable; Mid-range; High-end/splurge)
| Category | Drugstore Examples | Mid-Range Examples | High-End Examples |
|---|---|---|---|
| Primer | Maybelline Baby Skin (pore-minimizing) <br> Rimmel Stay Matte (for oily) | Smashbox Photo Finish (smoothing) <br> NYX SPF Moisturizing Primer | Hourglass Veil (glowy) <br> Laura Mercier Radiance Primer |
| Foundation/Tint | L’Oréal Infallible 24H (matte) <br> Revlon ColorStay (combo/oily) | IT Cosmetics CC+ Cream (SPF50) <br> Clinique Even Better (hydrating) | Armani Luminous Silk (radiant)<br> Estée Lauder Double Wear (long-wear) |
| Concealer | Maybelline Fit Me (undereye) <br> L’Oréal Infallible (spot/foundation) | Tarte Shape Tape (high coverage) <br> NARS Radiant Creamy (all-around) | Dior Backstage Face & Body (full) <br> Pat McGrath Dark Star (eyes) |
| Setting Powder | Rimmel Stay Matte (translucent) <br> Coty Airspun (classic) | Laura Mercier Translucent Powder <br> Hourglass Ambient Powder | Guerlain Meteorites (luminous) <br> Chanel Loose Powder |
| Bronzer/Blush | Physicians Formula Butter Bronzer <br> Milani Baked Blush | Benefit Hoola Bronzer <br> NARS Orgasm Blush | Chanel Les Beiges (bronze) <br> Charlotte Tilbury Cheek to Chic |
| Highlighter | Wet n Wild MegaGlo <br> Makeup Revolution Vivid Shimmer | BECCA Shimmering Skin Perfector (discontinued, but similar) <br> The Balm Mary-Lou | Dior Backstage Glow Palette <br> Fenty Killawatt |
| Eyeshadow | e.l.f. Bite-Size Palette (neutral) <br> Wet n Wild Color Icon Palettes | Urban Decay Naked Palette <br> Natasha Denona Mini Palette | Viseart Royal Smoke Palette <br> Tom Ford Eye Color Quad |
| Mascara | Maybelline Lash Sensational <br> L’Oreal Voluminous Original | Lancôme Lash Idôle <br> Benefit They’re Real | YSL Lash Clash <br> Chanel Inimitable Intense |
| Brow Product | NYX Micro Brow Pencil <br> Essence Make Me Brow (tinted gel) | Anastasia Brow Wiz <br> Benefit Precisely Micro Pencil | Tom Ford Brow Lift (gel/pencil) <br> Hourglass Arch Brow Sculpt |
| Lip Product | Burt’s Bees Tinted Lip Balm <br> Maybelline Baby Lips Tinted | Revlon Super Lustrous Lipstick <br> Clinique Pop Lip Color + Primer | Fenty Beauty Gloss Bomb <br> Dior Addict Lip Glow |
primer, L’Oréal Infallible foundation, powder blush). For dry skin, pick hydrating formulas (glow primers, dewy foundations, cream blush). Combination skin can mix: e.g. oily T-zone gets mattifying primer while cheeks use cream blush. For sensitive skin, stick to fragrance-free/dermatologist-tested lines (e.g. CeraVe/Tau Cerave tinted moisturizer, bareMinerals powder, Physicians Formula makeup).
Products by Skin Tone & Specific Needs: Dermatologists and beauty editors suggest products that suit various skin issues. For example, Allure’s Best of Beauty notes that Armani Luminous Silk Foundation works for all skin types including acne-prone. Marie Claire highlights L’Oreal Infallible 32H Matte (good for oily skin) and Fenty Pro Filt’r (best shade range, matte) as top picks. Broadly:
- Fair/Light skin: Choose lighter shade ranges and avoid overly warm pigments. Peachy blushes and nudes (MAC Please Me lipstick) suit well.
- Medium skin: Warm pinks and corals (NYX Pecan Praline blush, NARS Dolce Vita). Foundations like Maybelline Fit Me or Tarte Rainforest of the Sea handle medium tones.
- Deep skin: Rich berry blushes (Fenty’s Mimosa Sunrise), brick reds. For foundation, brands like Fenty Beauty Pro Filt’r, MAC Studio Fix, and estée Lauder Double Wear have deep shades. Lips in deep rose or burgundy work well. Foundations with green/blue pigments (like the updated Armani) prevent ashiness on deep skin.
Table: Face/Complexion Products by Budget
| Product Type | Drugstore Examples | Mid-Range Examples | High-End Examples |
|---|---|---|---|
| Primer (face) | Maybelline Baby Skin; Rimmel Stay Matte | Smashbox Photo Finish; e.l.f. Poreless | Hourglass Veil; Laura Mercier Radiance |
| Foundation/Tint | L’Oréal Infallible 24H; Revlon ColorStay (Combo/Oily) | IT Cosmetics CC+ Cream; Clinique Even Better | Armani Luminous Silk; Estée Double Wear |
| Concealer | Maybelline Fit Me; L’Oréal Infallible (spot) | Tarte Shape Tape; NARS Radiant Creamy | Dior Backstage; Pat McGrath Concealer |
| Setting Powder | Rimmel Stay Matte; Coty Airspun | Laura Mercier Translucent; Milani Deluxe | Hourglass Veil; Guerlain Meteorites |
| Bronzer/Contour | Physicians Formula Butter Bronzer; NYX Matte | Benefit Hoola; Too Faced Chocolate Soleil | Chanel Les Beiges; Tom Ford Shade & Illuminate |
| Blush (Cheeks) | Milani Baked; NYX Sweet Cheeks; Wet n Wild | NARS Orgasm; Tarte Amazonian Clay | Charlotte Tilbury Cheek to Chic; Dior Rosy Glow |
| Highlighter | Wet n Wild MegaGlo; Makeup Revolution Vivid | BECCA Shimmering Skin Perfector; The Balm Mary-Lou | Dior Backstage Glow; Fenty Killawatt |
| Powder Blush/Bronzer | May combine blush & bronzer in table above |
Table: Eye and Lip Products by Budget
| Product Type | Drugstore Examples | Mid-Range Examples | High-End Examples |
|---|---|---|---|
| Eye Shadow (Neutral) | e.l.f. Bite-Size Palette; NYX Ultimate Neutrals | Urban Decay Naked Palette; Too Faced Natural Eyes | Natasha Denona Mini; Charlotte Tilbury Pillow Talk palette |
| Eyeliner | NYX Auto Eyebrow; Essence Eyeliner (soft pencil) | MAC Technakohl; Clinique Pretty Easy liquid | Tom Ford Eye Defining Pen; Marc Jacobs Highliner |
| Mascara | Maybelline Lash Sensational; L’Oreal Voluminous | Lancôme Lash Idôle; Benefit They’re Real | Chanel Inimitable; Yves Saint Laurent Lash Clash |
| Brow Product | NYX Micro Brow Pencil; Essence Make Me Brow Gel | Anastasia Brow Wiz; Benefit Precisely | Tom Ford Brow Lift; Hourglass Arch Brow Sculpt |
| Lip Balm/Tint | Burt’s Bees Tinted Lip Balm; Maybelline Baby Lips | Revlon Super Lustrous; Clinique Chubby Stick | Fenty Gloss Bomb; Dior Addict Lip Glow |
| Lip Color | Revlon Colorburst lipstick; NYX Soft Matte Lip Cream | MAC Velvet Teddy (neutral); NARS Audacious (bold) | Charlotte Tilbury Pillow Talk; Fenty Stunna (red) |
Minimalist 5-Item Travel/Starter Kit
For a very lean kit or travel pouch, keep just these essentials:
- Tinted Moisturizer or BB Cream (with SPF): combines primer, moisturizer, and coverage (e.g. CeraVe Tinted SPF 30 or BareMinerals Complexion Rescue).
- Concealer: to cover dark circles and spots (e.g. Maybelline Fit Me or Tarte Shape Tape).
- Multipurpose Cream Stick: A cream blush or shadow that doubles on lips/cheeks (like NARS Multiple or MAC Glow Play Blush).
- Mascara (or tinted Brow Gel): Either a mascara or a tinted brow gel, whichever you prefer for definition. One product can suffice to brighten eyes.
- Tinted Lip Balm/Color: A moisturizing lip tint or balm with a hint of color (Burt’s Bees tinted balm, or Stila Stay All Day liquid lip).
These 5 items allow you to do all steps in a pinch: e.g., use moisturizer or primer from item (1) for base, concealer (2) for eyes/spots, cream stick (3) for cheeks and lips, (4) for eyes, and (5) for lips.