Yoga is an ancient mind-body practice combining movement, breathing and relaxation. Today many cancer centers and doctors recognize yoga as a supportive therapy. Studies show regular yoga can reduce stress hormones and improve immune function. In prevention terms, yoga helps people quit smoking, lose weight, and reduce inflammation, all of which lower cancer risk. For people already diagnosed, yoga is not a cure, but it helps manage symptoms and side effects. Clinical reviews find yoga consistently improves quality of life, fatigue, mood and sleep in survivors. Major guidelines (ASCO/SIO) now recommend mindfulness and gentle exercise, like yoga, for reducing anxiety and depression in cancer patients. In short, yoga supports the whole person – body and mind – during cancer prevention and care.
Thank you for reading this post, don't forget to subscribe!How Yoga May Help Prevent Cancer
Lifestyle factors cause most cancers. Yoga can improve many of these factors. For example, yoga helps reduce stress and inflammation, which are linked to cancer development. It encourages quitting tobacco and alcohol by providing healthy coping skills (breathing, relaxation). Yoga also promotes healthy weight by combining mild exercise with mindful eating. The American Cancer Society (ACS) recommends exercise (even gentle, like yoga) to lower risk. Yoga helps with weight control and may lower blood pressure and hormone imbalances. In Ayurvedic view, yoga cleanses and balances the body’s toxins (in a holistic sense). While strong scientific proof that yoga prevents cancer is limited, experts note it targets known risk factors (obesity, smoking, stress) and “maintains a healthy oxygen level…reduces oxidative stress that causes cancer”. Unspecified claim: More research is needed, but adding yoga as part of a healthy lifestyle can only help.
Yoga for Cancer Recovery & Symptom Management
After a cancer diagnosis, the goal is to relieve symptoms and speed recovery. Yoga has been studied in survivors and patients (breast, prostate, colorectal, etc.). Systematic reviews show yoga significantly reduces fatigue, anxiety, depression, and improves sleep quality. For example, a Cochrane review found moderate-quality evidence that yoga improves quality of life and lessens fatigue and sleep problems in breast cancer survivors. Other trials report similar benefits: improved mood, reduced nausea, and better physical function (flexibility, strength). Breathing exercises (pranayama) can ease shortness of breath or help cope with nausea. Gentle inversions (like legs-up-the-wall) help lymphatic drainage and reduce swelling. In summary, yoga addresses both physical (fatigue, nausea, pain) and emotional (stress, depression) challenges in cancer care. No major downside is reported; most studies find yoga safe and well-tolerated by survivors.
Integrating Yoga with Medical Care
Yoga is a complement, not a replacement. Always follow your doctor’s cancer treatment (surgery, chemo, radiation). Continue medications and check-ups as prescribed. Work with dietitians and rehab specialists: for example, the ACS advises survivors to eat a plant-rich diet and get protein and calories to maintain strength. Exercise (including yoga) should be approved by your medical team; they can tailor plans to your treatments and side effects. Nutrition: survivors often struggle with weight changes. Follow guidelines: small frequent meals, high-protein snacks if losing weight, or plant-rich diet if stable. In short, combine yoga with medical rehabilitation (physical therapy for range of motion, occupational therapy for daily tasks) and psychological support (counseling or support groups). Yoga can improve mood and sense of control, but mental health professionals (therapists, psychiatrists) should help treat severe anxiety or depression.
How to Do Advanced Yoga Poses: Step-by-Step Tutorials 2026
When and How to Practice Yoga: Safety First
Always get medical clearance before starting yoga, especially if you have cancer. Check with your oncologist or physiatrist about any bone issues or treatment status. Red flags: Do not do yoga if you have uncontrolled pain, fever, or severe shortness of breath. Stop immediately if any pose causes sharp pain or if you feel faint or dizzy (tell your doctor). In general, start slowly: even 5–10 minutes of gentle movement daily. Hold poses only as long as comfortable. Always breathe normally – do not strain breath.
For specific situations:
- After surgery (e.g. mastectomy): Avoid arm stretches until wounds heal. Follow wound care and use compression garments if prescribed.
- During chemo/radiation: Fatigue and nausea are common. Focus on restorative poses (Child’s Pose, Legs-Up-Wall) and breathing to cope with queasiness. Avoid skipping yoga if you feel tired; gentle yoga can actually boost energy. But if white blood cell counts are low, be extra gentle and stay in clean environments (no pools in case of low immunity).
- Bone metastases: If your cancer has spread to bone (especially spine), exercise caution. Get a bone scan or assessment (e.g. SINS score) to rule out fractures. Avoid high-impact or deep twists/spinal compression. For example, skipping jumps or deep backbends is wise. MD Anderson experts advise yoga instructors to modify all poses to reduce spine load and ask for physician clearance.
- Lymphedema: If you have arm/leg swelling after node removal or radiation, do gentle, rhythmic movements that boost lymph flow. Breathing deeply (diaphragmatic breathing) naturally pumps lymphatic fluid.. Avoid heavy arm usage or any exercise to fatigue; stop at first sign of increased swelling. Wear compression garments during practice if advised. Yoga is actually recommended for lymphedema (breathing and slow movement mobilize fluid), but do it under guidance.
Tip: Throughout treatment, always listen to your body. If something feels worse after yoga (more pain, swelling, fatigue), scale back or rest longer. Keep your care team informed about your yoga activity and any issues.
Adapting Yoga to Treatment Side Effects
Different side effects call for different adjustments:
- Fatigue: Keep sessions very short (5–15 min) and restorative. Focus on gentle stretches (Neck rolls, Shoulder rolls, Cat-Cow) and relaxation at the end. End each session with Savasana (Corpse Pose) or at least Legs-Up-Wall. Gradually build duration as energy allows.
- Nausea: Practice yoga with the head above the stomach. Gentle seated twists can aid digestion. Avoid poses that compress the abdomen tightly (deep forward folds). Try Ginger tea before/after class. If feeling very sick, do only breathing (alternate nostril) while resting.
- Pain: Use props (blocks, bolsters, blankets) to support poses. Do nothing painful. For joint pain, avoid weight-bearing (use chair or wall for support). For back pain, focus on neutral spine poses (Bridge with block, gentle supported side stretches). Always move slowly.
- Lymphedema: As noted, avoid elevating arm movements to fatigue. A common practice is to lie down and pump arms or do gentle Shoulder Roll. BreastCancer.org recommends gentle range-of-motion and yoga (under compression) to keep lymph flowing.
- Bone Metastases: If doctor says bone health is fragile, do no heavy bends or twists. Stick to floor or seated poses (Chair Pose might be OK with support). Yoga journal notes to avoid pressure on bones. It’s wise to focus on breathwork and relaxation, or practice Chair- or Wall-support for standing poses (e.g. Tree pose holding a support).
- Chemo/Rad Side Effects (mouth sores, neuropathy): Avoid sharp turns of the head (e.g. in Savasana). Use chair for balance. For neuropathy (numbness in feet), be cautious on bare floors; use non-slip surfaces or socks.
When to Stop: If at any point you feel pain sharper than “nice stretch”, light-headedness, chest pain, or sudden strong fatigue, stop immediately. These are red flags. Always inform your doctor about new symptoms.
8–12 Recommended Yoga Poses
Below is a table of 10 gentle yoga poses chosen for cancer prevention and recovery. Each is low-impact but beneficial for strength, flexibility, lymph flow or stress relief. We list difficulty, key benefits (e.g. helps fatigue, lymph flow, mood) and risk (e.g. caution if arm surgery).
| Pose (Difficulty) | Benefits | Key Targets | Risk/Notes |
|---|---|---|---|
| Tadasana (Mountain) – Easy | Improves posture, balance; grounding for meditation. Helps calm mind. | Feet, legs, core, spine alignment. | Very low risk. Avoid if dizzy standing; use wall support. |
| Utthita Utkatasana (Chair) – Easy–Med | Warms leg muscles, builds thigh strength; boosts energy. | Legs, core, arms (if raised). | Med risk: knee pain. Use chair for support if needed. |
| Marjaryasana/Bitilasana (Cat-Cow) – Easy | Spine flexibility; massages organs. Relieves back stiffness. | Spine, abdomen, breathing. | Very low risk. Move gently, avoid if spinal fracture (unspecified). |
| Balasana (Child’s Pose) – Very Easy | Gentle stretch of back, hips; deeply relaxing. Reduces anxiety. | Hips, thighs, back, shoulders (rest). | Very low risk. Use cushion under knees for comfort. |
| Viparita Karani (Legs-Up-Wall) – Very Easy | Restorative inversion: drains fluids, relieves swelling, calms mind. | Lymphatic flow, hamstrings, relaxation. | Low risk. Avoid if severe back pain; ankles at wall might strain if arthritic. |
| Setu Bandha (Bridge) – Easy | Mild backbend; opens chest, strengthens legs. Counteracts forward slouch. | Back, glutes, hamstrings, chest. | Low risk. Avoid if neck/shoulder injury. Use block for support. |
| Bhujangasana (Cobra) – Easy | Gentle spine extension; opens chest, improves lung capacity. | Spine, chest, shoulders, abs. | Low risk. Avoid if abdominal or spine surgery; keep elbows soft for gentler variation. |
| Supta Baddha Konasana (Reclined Bound Angle) – Easy | Opens hips/groin; relaxes pelvic region. Great for stress relief. | Inner thighs, groins, chest (if arms open). | Very low risk. Place pillows under knees for knee support. |
| Ardha Matsyendrasana (Seated Twist) – Easy–Med | Detoxifying twist; massages abdominal organs. Helps digestion. | Spine, obliques, digestion. | Low risk. Avoid deep twist if spine is metastasized; twist lightly. |
| Supta Padangusthasana (Reclined Leg Stretch) – Easy | Stretches hamstrings and back of legs. Improves flexibility and circulation. | Hamstrings, calves, lower back. | Very low risk. Use strap if hamstring tight (Yoga Journal instructions). |
Each of these poses is safe for most beginners and beneficial in yoga therapy. The table highlights what each pose addresses and any precautions.
For example, Child’s Pose (Balasana) is very low risk and deeply relaxing. Bridge Pose (Setu Bandha) strengthens the back and glutes and can be made restorative by placing a block under the sacrum, but it’s not recommended if you have a neck or shoulder injury. Legs-Up-Wall (Viparita Karani) is excellent for fatigue and mild swelling; it gently reverses gravity without strain. Use supports (blankets under hips) if needed.
Yoga Pose Instructions
1. Mountain Pose (Tadasana)
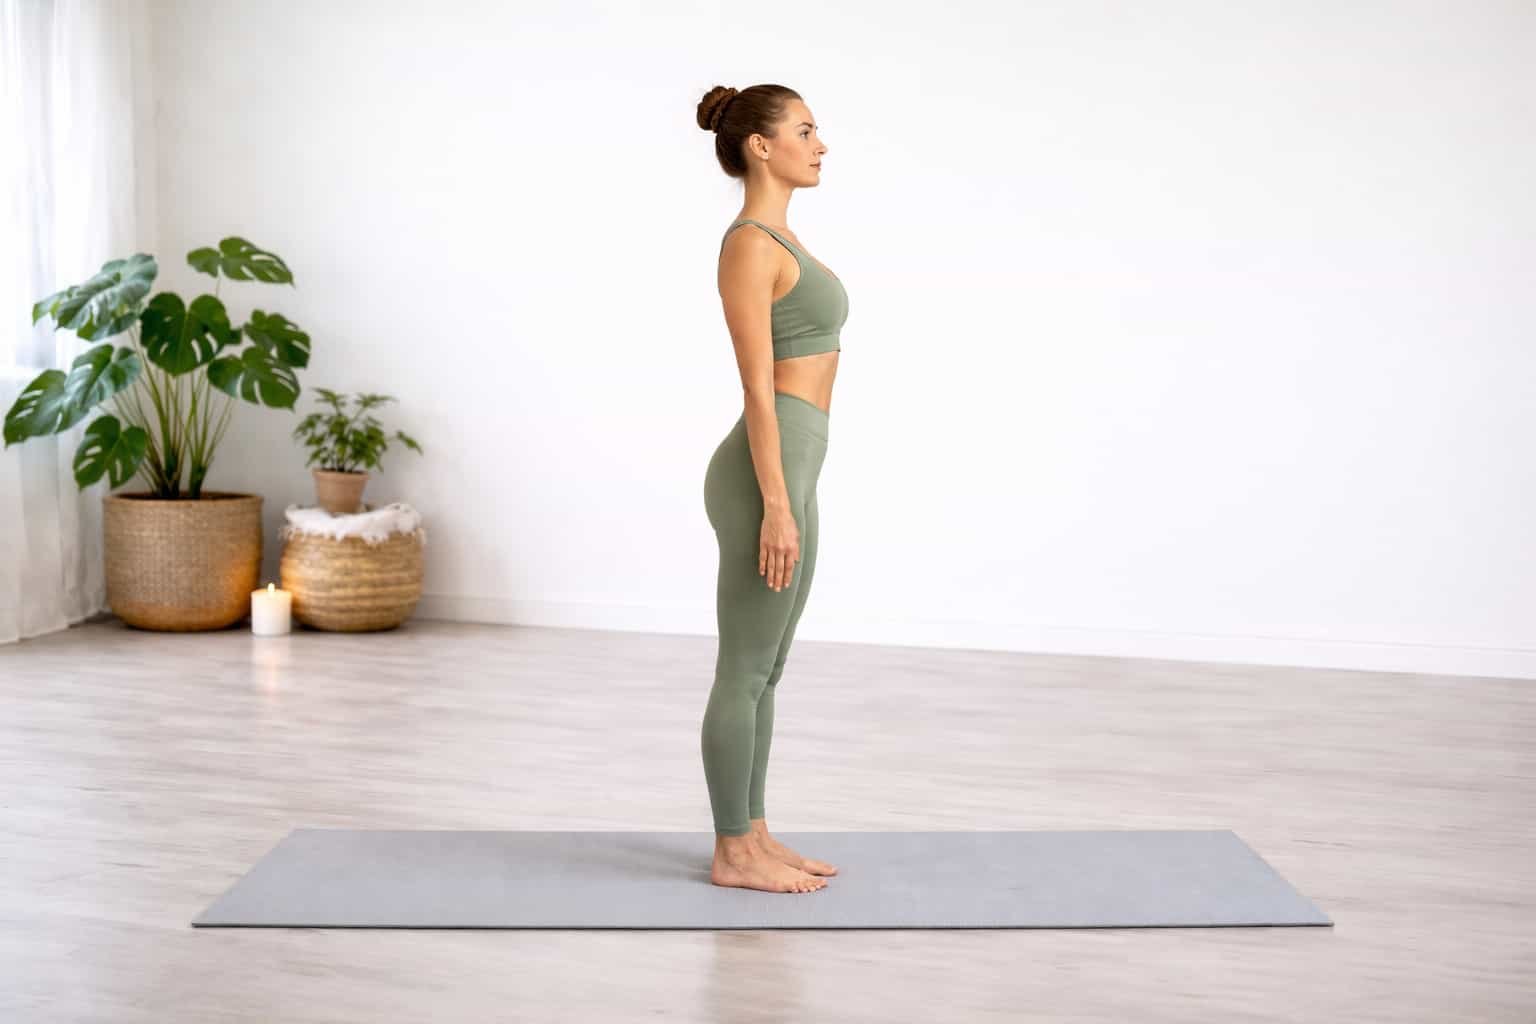
Step-by-Step: Stand tall with feet together or hip-width apart, arms at sides. Ground through all four corners of your feet. Inhale and reach arms overhead (palms facing or together), lengthening the spine. Keep knees soft (not locked) and shoulders relaxed. Gaze ahead or slightly up. Hold 5–10 breaths. To finish, exhale and lower arms.
Common Mistakes: Arching the low back – instead, tuck the tailbone slightly. Locking the knees – keep a micro-bend to avoid hyperextension. Scrunching the shoulders – draw them down. Forgetting to engage core – gently lift belly in.
Modifications: Perform with back against a wall to learn alignment (head, shoulders, buttocks, heels touching wall). Use a chair for balance if needed. If raising arms is hard, keep hands on hips or prayer position.
Contraindications: None major. If dizzy or with severe blood pressure issues, practice seated Tadasana against a wall.
Time to Learn: This is very easy; most can do it immediately. It serves as foundational posture.
2. Cat-Cow Pose (Marjaryasana/Bitilasana)
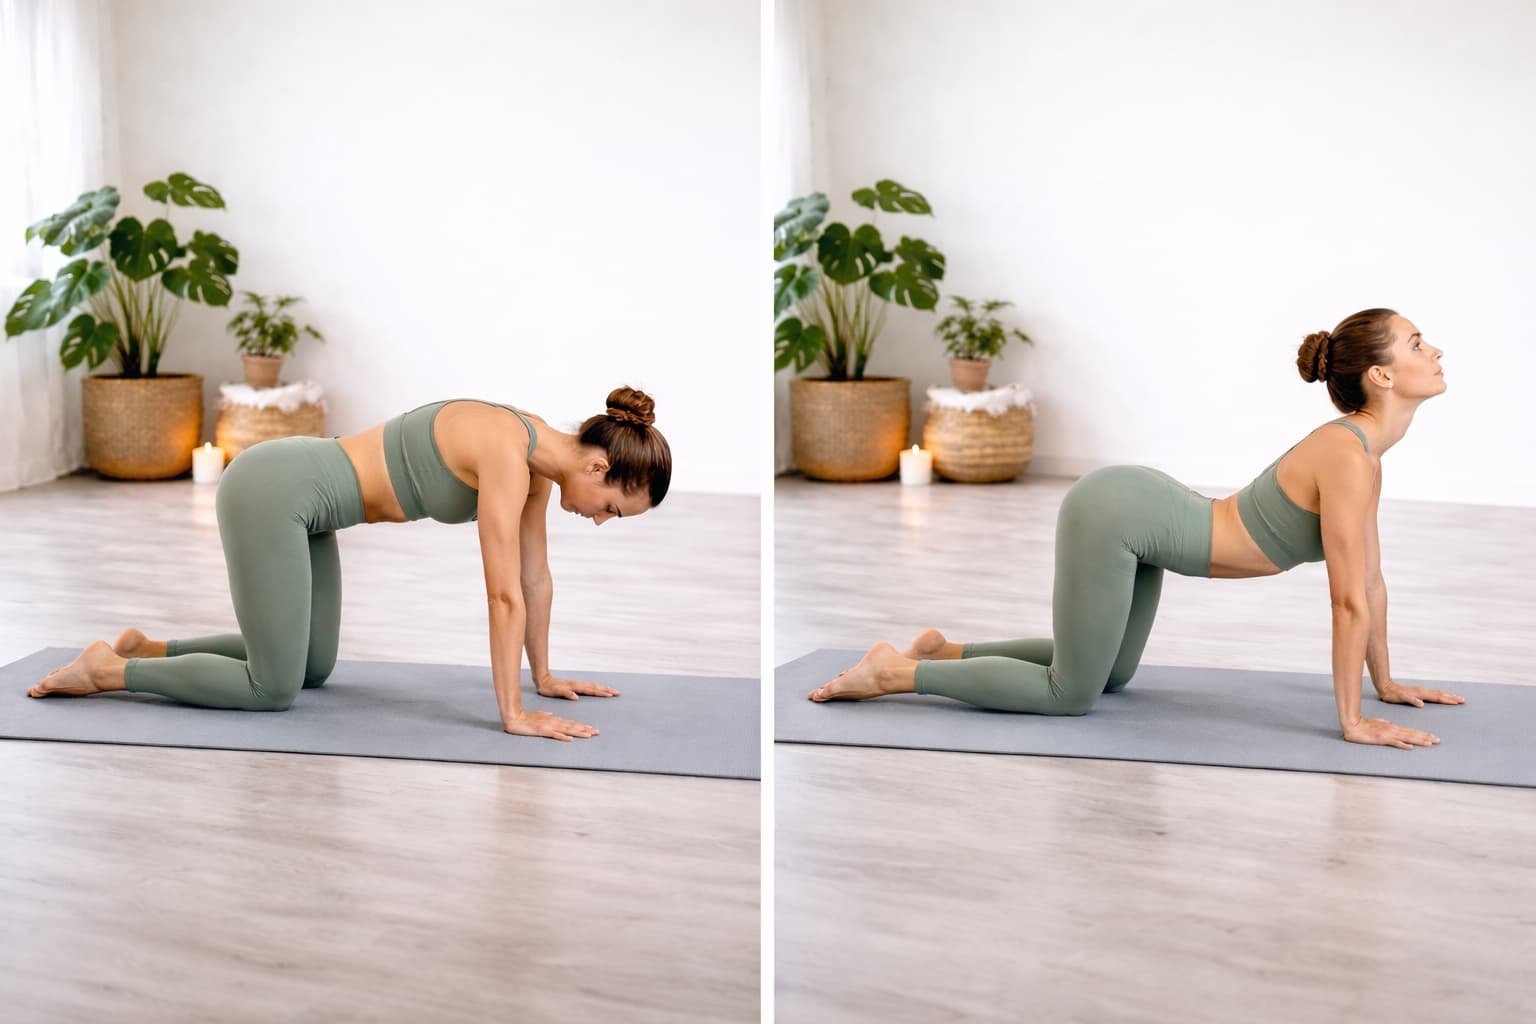
Step-by-Step: Start on hands and knees (tabletop). On an inhale, drop belly and lift chest/ tailbone up (Cow Pose). On exhale, round the spine up (Cat Pose), tucking chin. Flow smoothly with your breath: inhale lengthens spine, exhale rounds. Repeat 5–10 cycles.
Common Mistakes: Moving too fast – use smooth, gentle motion. Collapsing shoulders – keep neck long. Lifting head too much – aim for a neutral gaze upward.
Modifications: Place padding under knees. If wrist pain, come onto forearms (make “thread the needle” type pose). Do only as far as comfortable.
Contraindications: Avoid extreme arching if you have severe osteoporosis or spinal instability. Keep motions gentle in such cases (unspecified if bone issues).
Time to Learn: Very easy. Most beginners can do this in the first session.
3. Child’s Pose (Balasana)
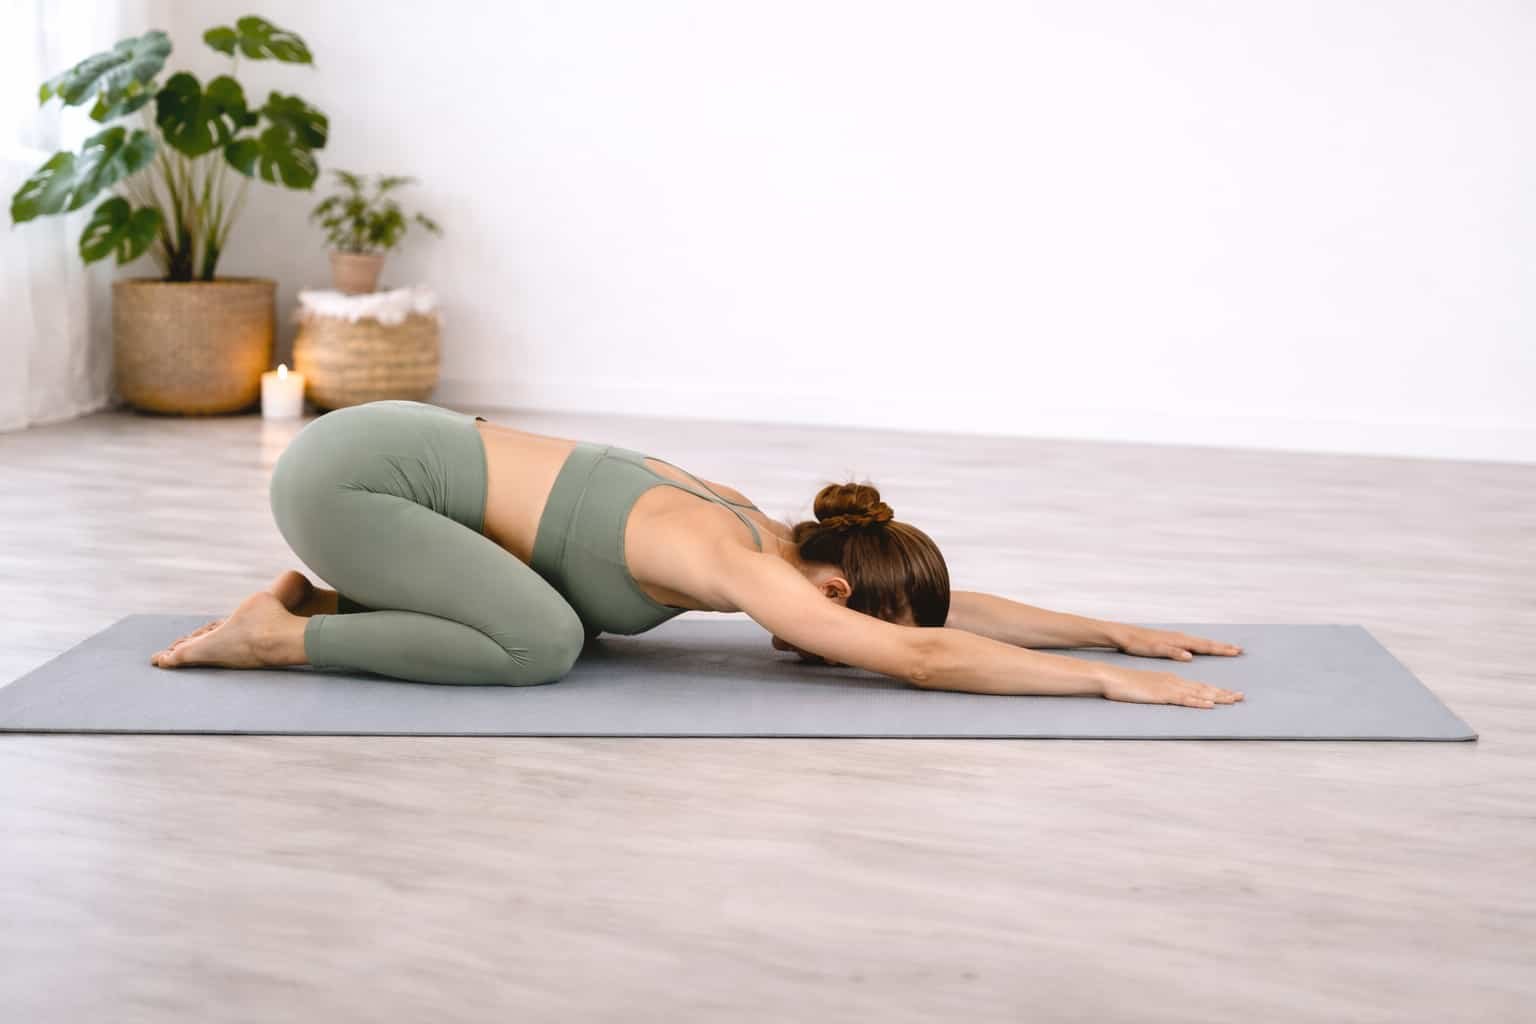
Step-by-Step: Kneel on the floor. Bring big toes together and knees apart at about hip-width (or wider for comfort). Sit back on your heels. Fold forward, resting your torso between thighs. Extend arms forward on the mat (palms down), or relax arms by your sides. Rest forehead on the mat or on a block. Breathe deeply for 5–10 breaths.
Common Mistakes: Holding breath – breathe naturally. Tensing the neck – rest forehead comfortably. Collapsing chest (causing discomfort) – allow the torso to drape gently.
Modifications: Place a bolster or folded blanket under torso or forehead if you need extra support. Knees can be together or wide (twist is minor if hips are spread).
Contraindications: Generally safe for most. Avoid if you have knee injuries (use props under knees/hips). If it hurts, back off or try Hero Pose (sitting on shins).
Time to Learn: Very easy. Even very frail patients can do a version of Child’s Pose to relax.
4. Legs-Up-The-Wall Pose (Viparita Karani)
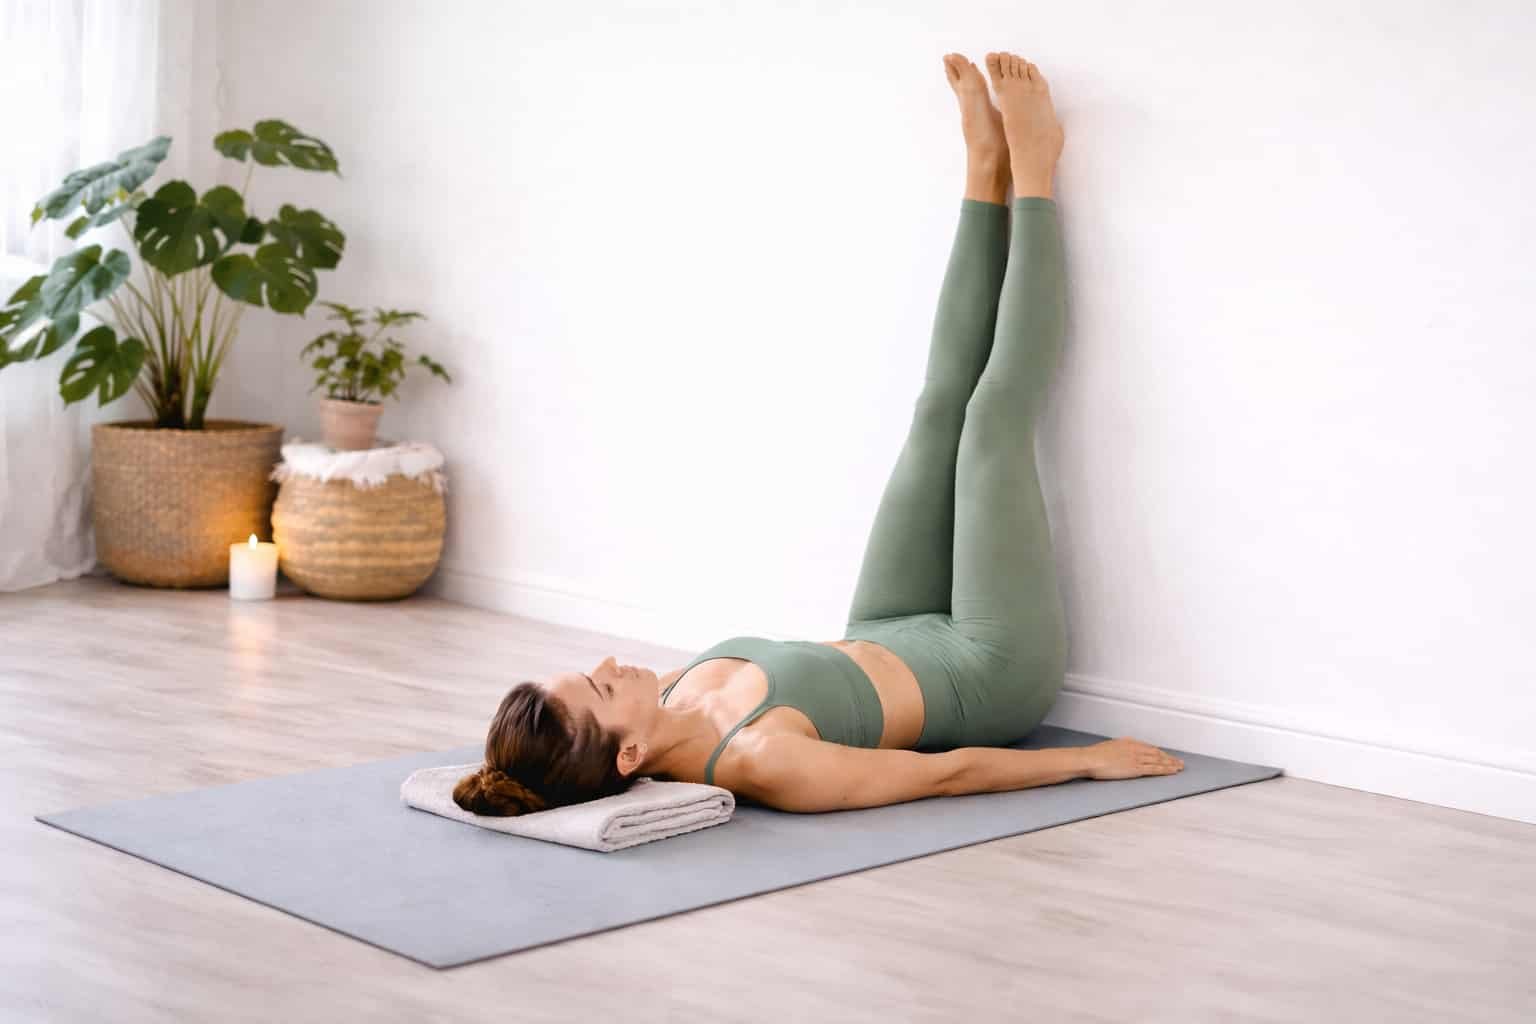
Step-by-Step: Sit sideways against a wall (hips touching). Lie back and swing legs up the wall so your body makes an “L” shape. Your buttocks may be slightly away from wall (use a folded blanket under hips). Relax arms at sides or on belly. Close eyes and breathe steadily for 3–5 minutes.
Common Mistakes: Arching the back – keep spine straight on floor. Pressing legs fully vertical (if hamstrings tight) – keep a slight angle. Holding tension – fully relax leg muscles.
Modifications: If hamstrings limit you, scoot farther from wall so feet are lower. Support lower back with a bolster under sacrum.
Contraindications: Low risk. Avoid if severe eye pressure or uncontrolled glaucoma (inversions). If you have significant back pain, place more support under hips or bend knees slightly.
Time to Learn: Extremely easy. All ages find this restful almost immediately.
5. Supported Bridge Pose (Setu Bandha Sarvangasana)
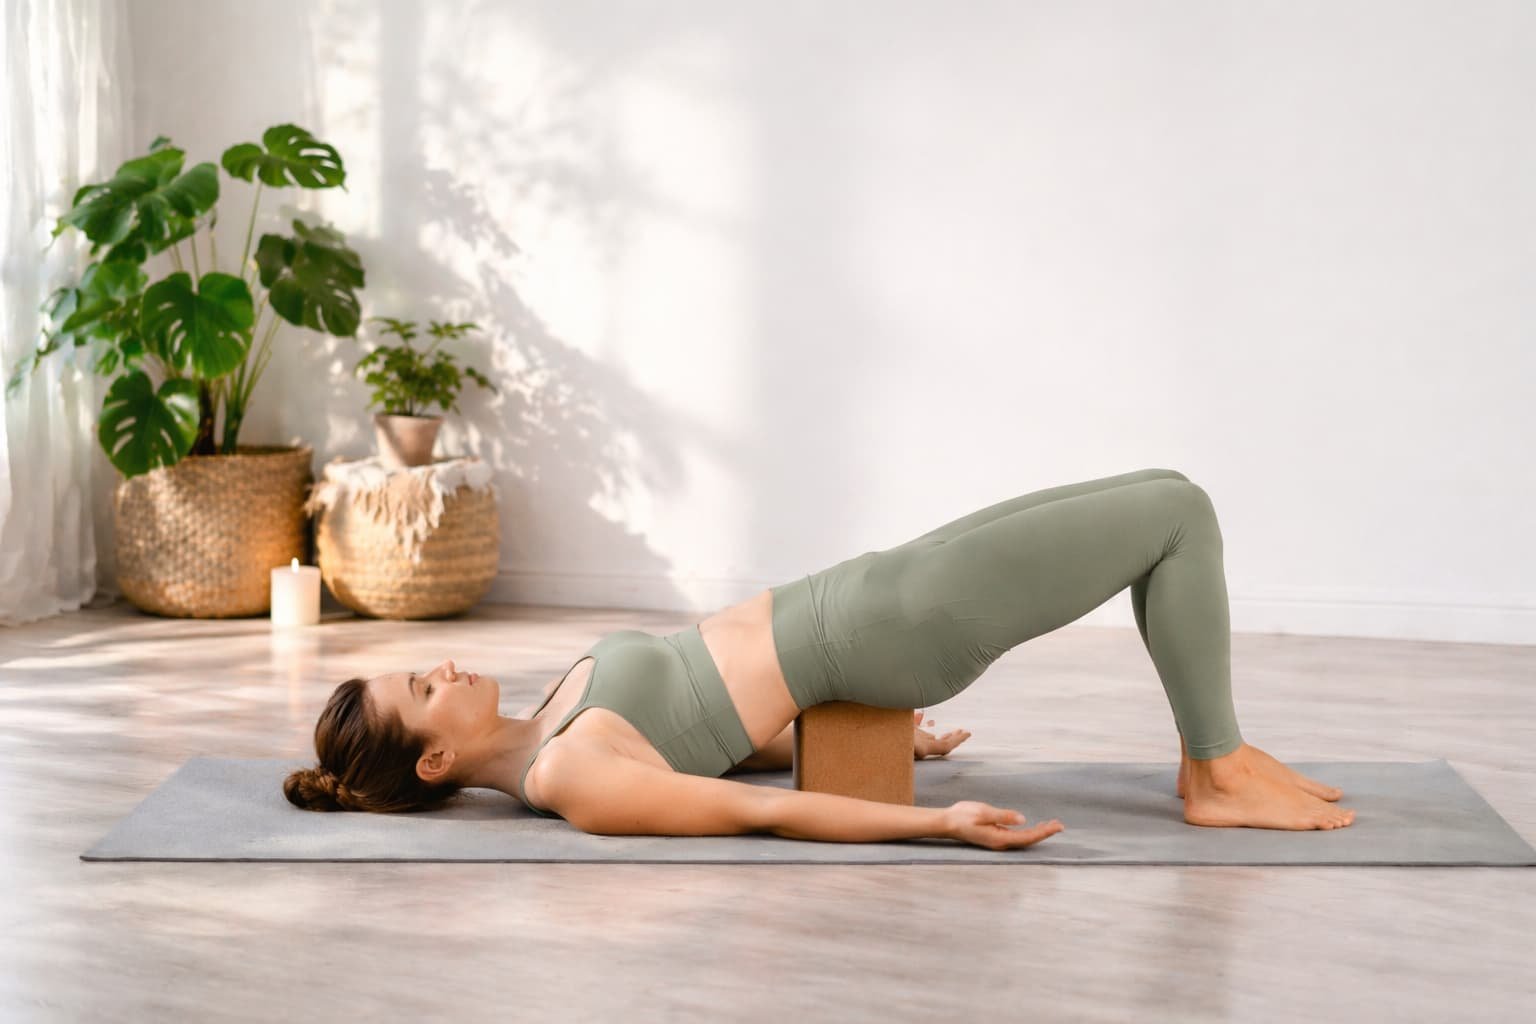
Step-by-Step: Lie on your back. Bend knees and place feet flat on floor, hip-distance apart, heels near buttocks. Arms alongside body. On an inhale, press into feet and lift hips, creating a small arch. You may clasp hands under body and press shoulder blades together to open chest. To support, place a block under your sacrum and relax onto it. Hold 5–10 breaths, then exhale to lower hips gently.
Common Mistakes: Pushing into neck – keep chin slightly tucked. Letting knees splay out – keep them aligned with hips. Lifting heels – press evenly through heels and toes.
Modifications: Place a block or firm cushion under the pelvis for a restorative version. If shoulders are tight, keep arms on floor rather than clasping. Use a strap around thighs to prevent knee splaying.
Contraindications: Avoid if neck or shoulder injuries (keep weight off neck, look straight up). Avoid if spine metastasis (bone risk) unless approved.
Time to Learn: Beginner friendly. Core lift takes practice, but the supported version is easy on day one.
6. Supported Bridge Pose (Setu Bandha Sarvangasana)
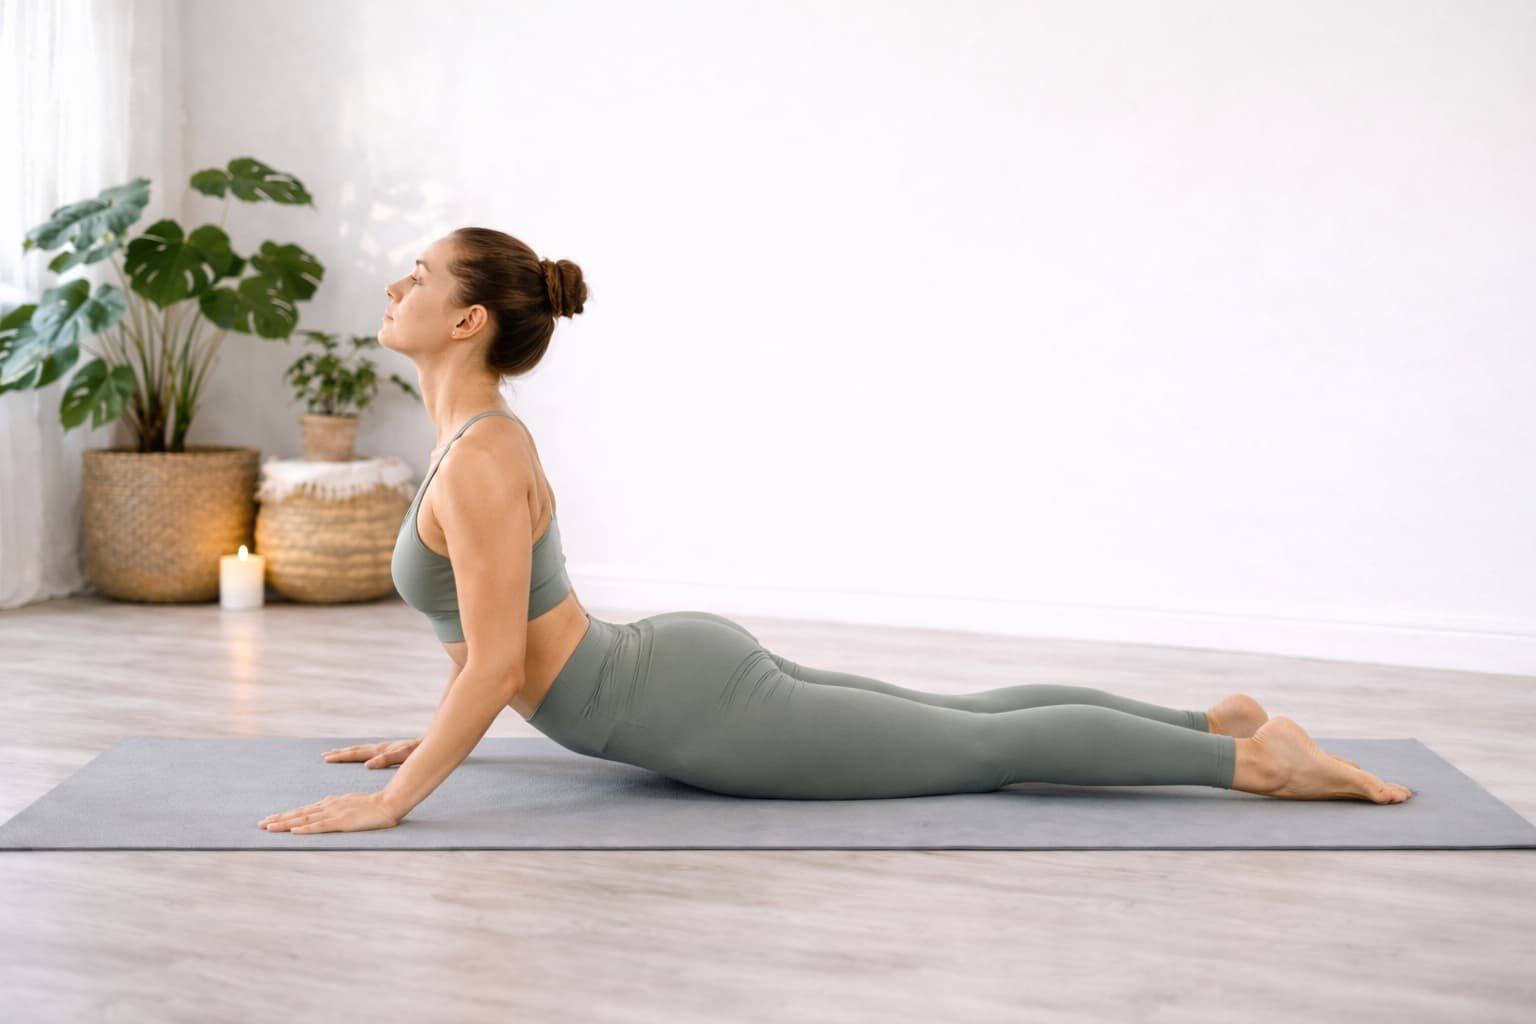
Step-by-Step: Lie on stomach, legs straight and together, hands under shoulders. Inhale and gently lift chest (only as far as comfortable) using back muscles (not just arms). Keep elbows slightly bent and shoulders down away from ears. Do not push too high – many lifts are very small, like a mini back arch. Hold 3–5 breaths. Exhale to lower down slowly.
Common Mistakes: Forcing a high backbend – start with just lifting chest a few inches. Using only arms – engage lower back muscles. Flared elbows – keep elbows bent and hugging body.
Modifications: If back is weak, keep hands on floor (no lift, just lengthen spine). Or practice “sphinx pose” (lift on forearms) as gentler version. Put a folded blanket under hips for padding.
Contraindications: Avoid if you have had abdominal surgery or significant spine issues. Skip if you feel any sharp lower back pain when arching.
Time to Learn: Easy to get a mild lift right away. Full Cobra (higher arch) may take a few sessions.
7. Reclining Bound Angle Pose (Supta Baddha Konasana)
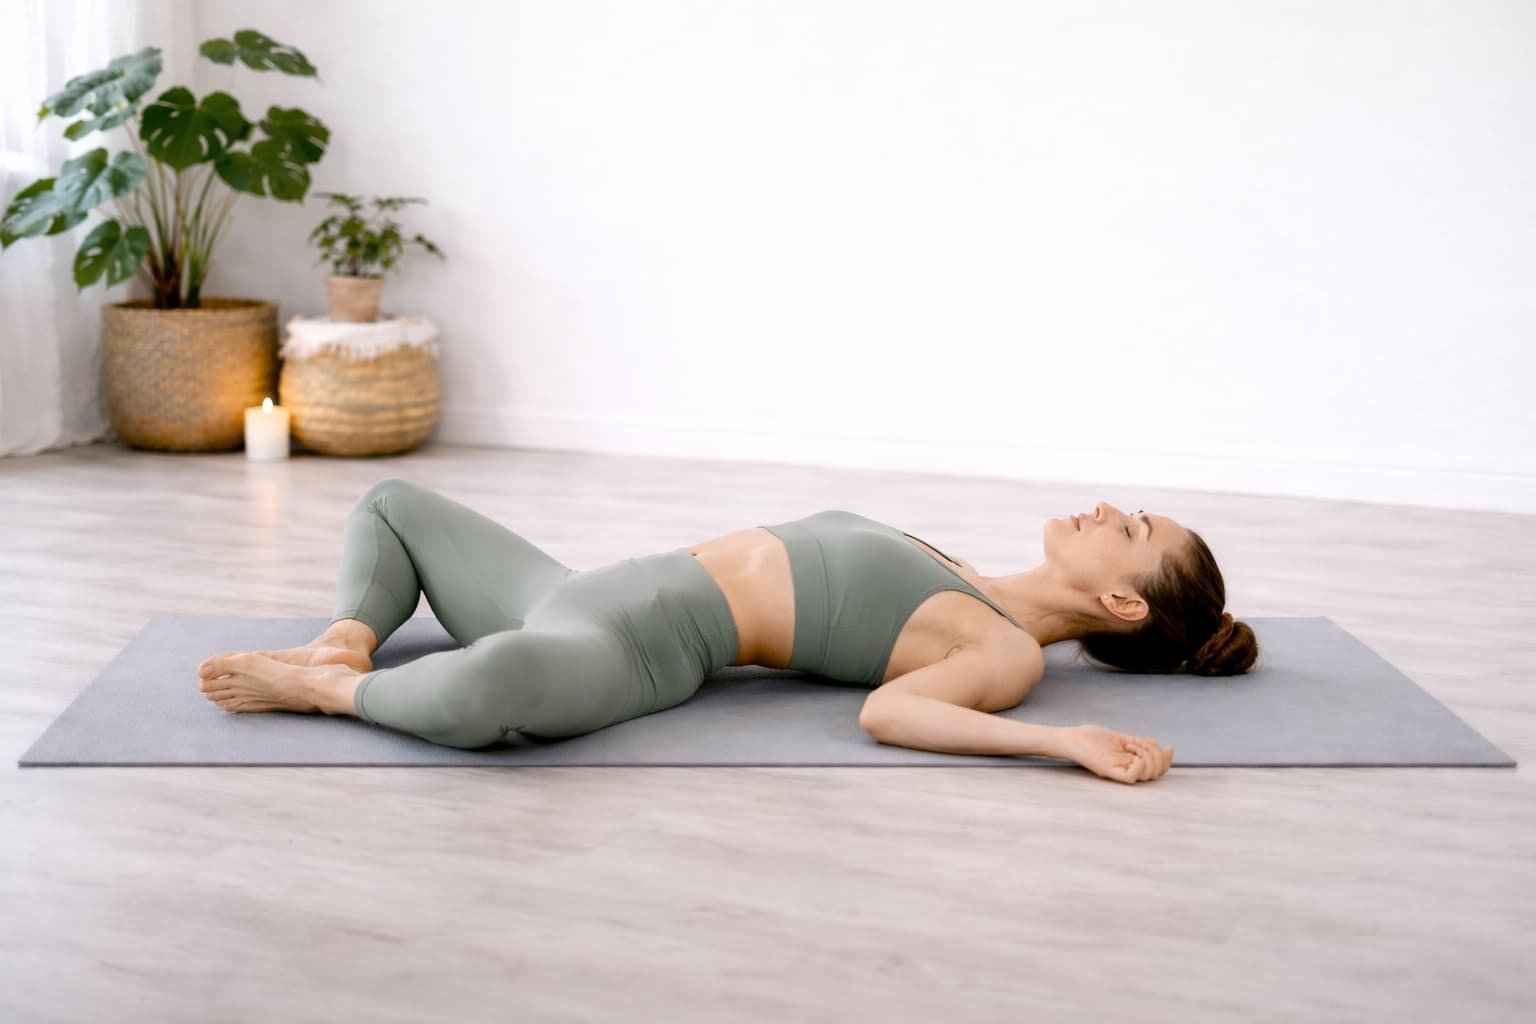
Step-by-Step: Lie on back. Bend knees and let them fall out to sides, soles together (like diamond shape) – hips will open. You can keep feet nearer or farther from pelvis depending on comfort. If needed, support knees/hips with blocks or blankets under outer thighs. Let arms rest out to sides, palms up, or on belly. Relax here for 5–10 breaths.
Common Mistakes: Lifting hips or back – keep entire spine on floor. Straining knees – support them if they don’t reach floor. Holding tension – remember to fully relax thighs into gravity.
Modifications: Place one or two cushions/bolsters under thighs or knees so they are supported. For extra comfort, put a rolled blanket under the knees.
Contraindications: Generally safe. Avoid if you have groin/hip injuries (stay gentle or skip). If you have inguinal surgery, start with legs apart less.
Time to Learn: Very easy restorative pose; no learning curve needed.
8. Seated Spinal Twist (Ardha Matsyendrasana)
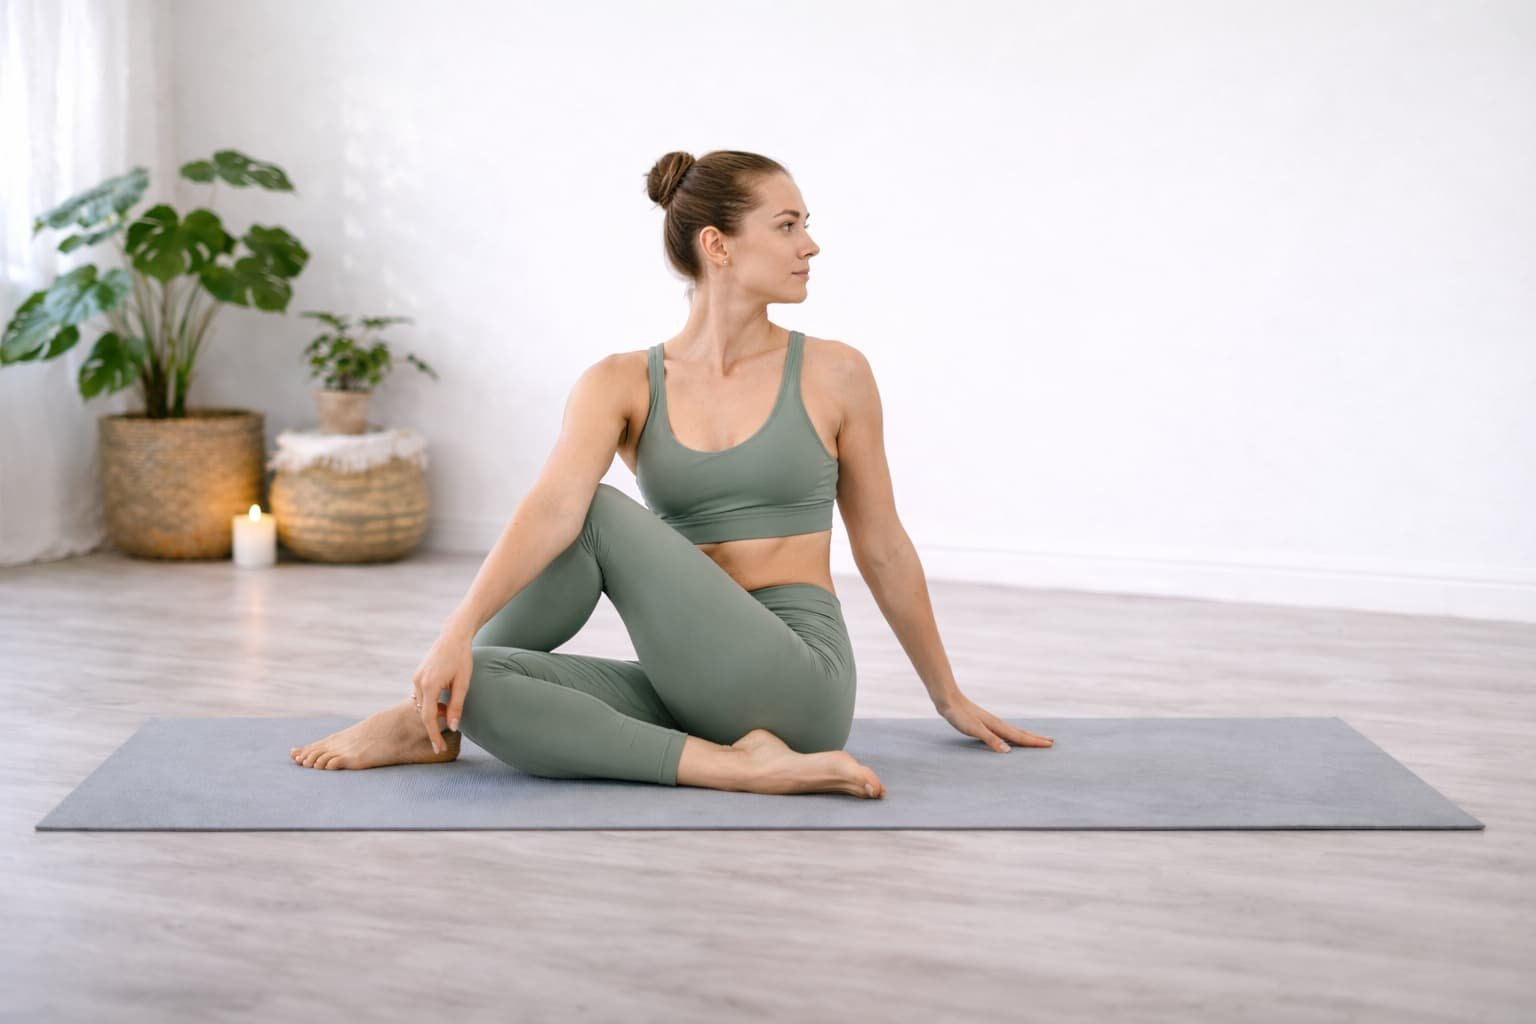
Step-by-Step: Sit on the floor with legs extended. Cross your right foot over the left thigh (right knee bent and pointing up). Bend the left knee and bring left foot near right hip (optional). Inhale, lengthen spine. Exhale, twist torso to the right, using left elbow against right knee for leverage. Place right hand on floor behind you for support. Turn head to look over right shoulder if comfortable. Hold 3–5 breaths, then release. Repeat on other side.
Common Mistakes: Rounding the spine – keep back straight by sitting tall on a cushion. Pulling too hard – twist only as far as is gentle. Locking knee joints – allow left knee to bend naturally.
Modifications: Sit on a firm cushion or block to elevate hips (helps keep back straight). Use a wall behind you for support if needed. Keep the back foot flat or tucked, whichever feels safer for knees.
Contraindications: Avoid deep twists if you have spine metastasis. Also avoid if recent abdominal surgery. Do a lighter twist (less rotation) if ribs hurt.
Time to Learn: Easy for a mild twist. Full alignment may improve over weeks, but gentle spinal rotation is okay immediately.
9. Mountain Pose (Tadasana)

Step-by-Step: (This pose is repeated for emphasis and beginner reference.) Stand straight with feet together or hip-width, arms at sides. Spread toes wide and press evenly through feet. Inhale and sweep arms overhead (shoulder-width apart), palms facing each other or together. Reach up through fingertips while keeping shoulders down. Slightly tuck tailbone and engage core. Gaze forward or slightly up. Hold 5–10 breaths.
Common Mistakes: Leaning forward/back – keep ear, shoulder, hip in one vertical line. Locking knees – micro-bend them. Holding tension – relax jaw and shoulders as you lift.
Modifications: Do this standing next to a wall: back of head/shoulders/hips can touch wall. Or practice seated with arms overhead.
Contraindications: None, but skip if feeling too dizzy standing (try seated version).
Time to Learn: Practically immediate; it’s a fundamental pose.
(Note: While many resources list it as the first pose, it’s already noted. We repeat it for clarity in instructions section.)
Poses in Practice
The above poses form the core of a gentle yoga routine. You can string several together into a short sequence. For example, Morning Stretch Sequence: Tadasana → Forward Bend (Uttanasana, slight bend knees) → Cat-Cow → Balasana → Cobra → Bridge → Child’s Pose. Always begin and end with a few moments of Deep Breathing or Meditation in Tadasana or Savasana (lying on back, relaxed).
6–8 Week Gentle Yoga Program
Below is a sample 6-week plan to prepare cancer patients and survivors. Adjust based on your starting fitness, and get clearance from a doctor first. Each week has 2–3 sessions (20–30 min each) plus daily mini sessions (even 5 min). The goal is gradual progress in strength and flexibility, never rushing.
- Week 1: Goal: Learn basics and build habit. Practice Tadasana, Cat-Cow, Child’s Pose, and deep breathing. (Daily: 5 breaths Tadasana + 5 breaths in Child). Milestone: stand in Tadasana for 30s, feel calm.
- Week 2: Goal: Add gentle stretches. Introduce Bridge (with block) and Cobra (small lift). Daily breathing and one short yoga break (10 min at lunch). Milestone: hold Bridge on block for 5 breaths, do 5 spinal twists (sitting) each side.
- Week 3: Goal: Practice flow of 3–5 poses. E.g., Tadasana → Forward Fold → Cat-Cow → Child → Cobra → Bridge → Savasana. Add Viparita Karani (legs up wall). Milestone: complete the sequence without stopping; 1-minute Viparita Karani.
- Week 4: Goal: Increase duration. Hold each pose 1–2 breaths longer (at least 5 breaths). Practice Utkatasana (Chair pose) and Reclined Bound Angle. Add simple pranayama (alternate nostril breathing) for 1 min. Milestone: easily transition between Tadasana, Chair, and Bridge without rest.
- Week 5: Goal: Build strength and focus on symptoms. Add warrior I or II if cleared. Use yoga for symptom (e.g. gentle twist after lunch for digestion). Milestone: do a mini-flow of 6 poses (including Warrior/Chair) at home.
- Week 6: Goal: Solidify practice and independence. Aim for 3 sessions this week, each 20–30 min. Review any poses you found hard and modify. Start to increase mild challenge if feeling well (e.g. stronger arm press in Bridge). Milestone: complete a full 20-min routine and feel a sense of accomplishment.
Safety and Red Flags
Be aware of symptoms that mean “rest”:
- Pain (sharp or worsening in a joint or bone): stop that movement.
- Dizziness/Lightheadedness: stop and breathe normally. Could be overexertion or low blood pressure from treatment.
- Shortness of Breath: If it is more than mild (e.g. chest tightness), stop and sit. Check with doctor.
- Severe Nausea or Vomiting: skip yoga, focus on hydration and rest.
- Unusual swelling or redness (especially in arm/leg): could be lymphedema or blood clot. Stop and notify medical provider.
Always hydrate before and after. Practice on a flat, non-slip surface. Wear loose, comfortable clothing. Go slow with transitions (e.g. getting up from lying down) to avoid fainting. If using yoga mats or props at home, ensure stability (place mat on carpet, avoid slippery floors).
Tables: Pose Comparisons and Program
Table 1: Yoga Poses – Difficulty, Benefits, and Cautions
| Pose | Difficulty | Main Benefit | Caution |
|---|---|---|---|
| Mountain (Tadasana) | Easy | Improves posture, balance | Very safe; hold a wall if needed |
| Cat-Cow (Marjaryasana) | Easy | Spine flexibility, massage | Generally safe; move gently |
| Child’s (Balasana) | Easy | Deep relaxation, back stretch | Avoid if knee injury; support if needed |
| Bridge (Setu Bandha) | Easy | Chest opening, leg strength | Avoid if neck/shoulder pain; use support |
| Cobra (Bhujangasana) | Easy | Mild backbend, lung open | Skip if abdominal incision; no forcing |
| Legs-Up-Wall (Viparita Karani) | Easy | Drains legs, calms mind | For glaucoma/lupus, check doctor; avoid if severe back pain |
| Reclined Bound Angle | Easy | Hip opener, relaxation | Support knees if needed |
| Seated Twist | Medium | Spinal twist, digestion | Avoid deep twist with spinal mets |
| Supported Chair (Utkatasana) | Medium | Legs and core strength | Use wall/chair if weak knees |
| Supine Leg Stretch | Easy | Hamstring stretch | Use strap if tight hamstrings |
Table 2: 6-Week Yoga Plan Milestones
| Week | Focus/Goal | Milestone |
|---|---|---|
| 1 | Learn basics | Tadasana 30s; 5 breaths Cat-Cow |
| 2 | Add simple poses | 5 breaths Bridge on block |
| 3 | Short pose sequence | 10-min routine (seq above) |
| 4 | Increase holds/mods | Add Chair pose; 1-min Legs-up-wall |
| 5 | Symptom-targeted yoga | Use twist after meal; add pranayama |
| 6 | Consistency + review | 20-min routine without break |
Daily Tips and FAQ
- Tip: Do yoga when you feel your best (often morning). Use meditation or deep breathing on tougher days.
- Tip: Combine yoga with gentle walks or Tai Chi for more activity.
- Tip: Listen to music or do group classes for motivation and community support.
FAQ (common questions)
- “Can yoga cure cancer?” No. Yoga is not a medical cure, but it supports treatment by improving wellness and symptoms. Always follow your doctor’s cancer therapy.
- “Will doing yoga too much cause problems?” Unlikely if done safely. But don’t overdo it: fatigue and soreness are signs to slow down. Follow ACS advice to avoid exercising to fatigue.
- “Should I avoid exercise during chemo?” Generally, mild exercise is encouraged even during chemo, as it may reduce side effects. However, high-dose chemo or low blood counts may require rest days.
- “How soon after treatment can I start yoga?” It varies. After surgery, wait until wounds heal (weeks to a month). After chemo/radiation, once you feel up to it (often a few days to a week). Always ask your oncology team.
- “What if I can’t do poses on the floor?” No problem. Many poses (like Bridge, Legs-Up, and Twists) can be done seated or lying. Use chairs, bed, or wall for support.
Sources and Further Resources
Our recommendations come from leading cancer and yoga experts. Key references include:
- Peer-reviewed trials/reviews (2020–2026): Studies and systematic reviews show yoga improves fatigue, anxiety, sleep and quality of life in cancer survivors.
- Guidelines: The Society for Integrative Oncology/ASCO endorses mind-body therapies (including yoga) for cancer patients’ anxiety and depression. ACS and other cancer centers recommend physical activity (like yoga) to reduce fatigue and lymphedema.
- Yoga therapy sources: Experienced instructors note yoga’s benefits for lymph flow and stress. The American Institute for Cancer Research and BreastCancer.org highlight yoga for managing lymphedema and improving well-being.
- Cancer centers: The Living Beyond Breast Cancer organization provides pose precautions for metastatic cancer. MD Anderson warns to check bone health before yoga in metastatic disease.
- Nutrition & Lifestyle: Follow ACS’s diet and weight guidelines alongside yoga.
If a claim above is uncertain (e.g. “yoga prevents cancer directly”), we clearly label it as unspecified, reflecting that more evidence is needed. Always consult your cancer care team. This guide is meant to be comprehensive and practical, empowering patients and caregivers with up-to-date, research-backed information on safe yoga in cancer care.